This article describes what the Coviu / Nookal integration provides you with and how to set it up.
Last Updated: Sept 2021
How does the Coviu / Nookal integration connect me to my client or patient?
The Coviu / Nookal integration uses our Scheduled Session workflow for connecting you and your patient into a consultation.
This means that both the clinician and client get a unique session link for each consultation. The link can only be used for that session and no future sessions. This differs from our Waiting Area or User Rooms which have a permanent static link allowing for generic entry to those workflows (with permission).
FAQ's
- Can I use this integration if I am on Coviu's Starter plan?
- No. Click here to check which plan you are on.
- Does the integration allow me to transfer or save information from the call into the patient record in Nookal?
- No. This integration is about simplifying the invitation process and connection into Coviu.
- Can I save or transfer information about the call or from the call to the patient record?
- No. There is currently no option for this.
Where is the Invitation sent from?
When you connect your Coviu and Nookal accounts, the invitation will be sent to your client or patient from Coviu.
What does the booking look like in Nookal?
This is how a booking made via Coviu shows up on Nookal: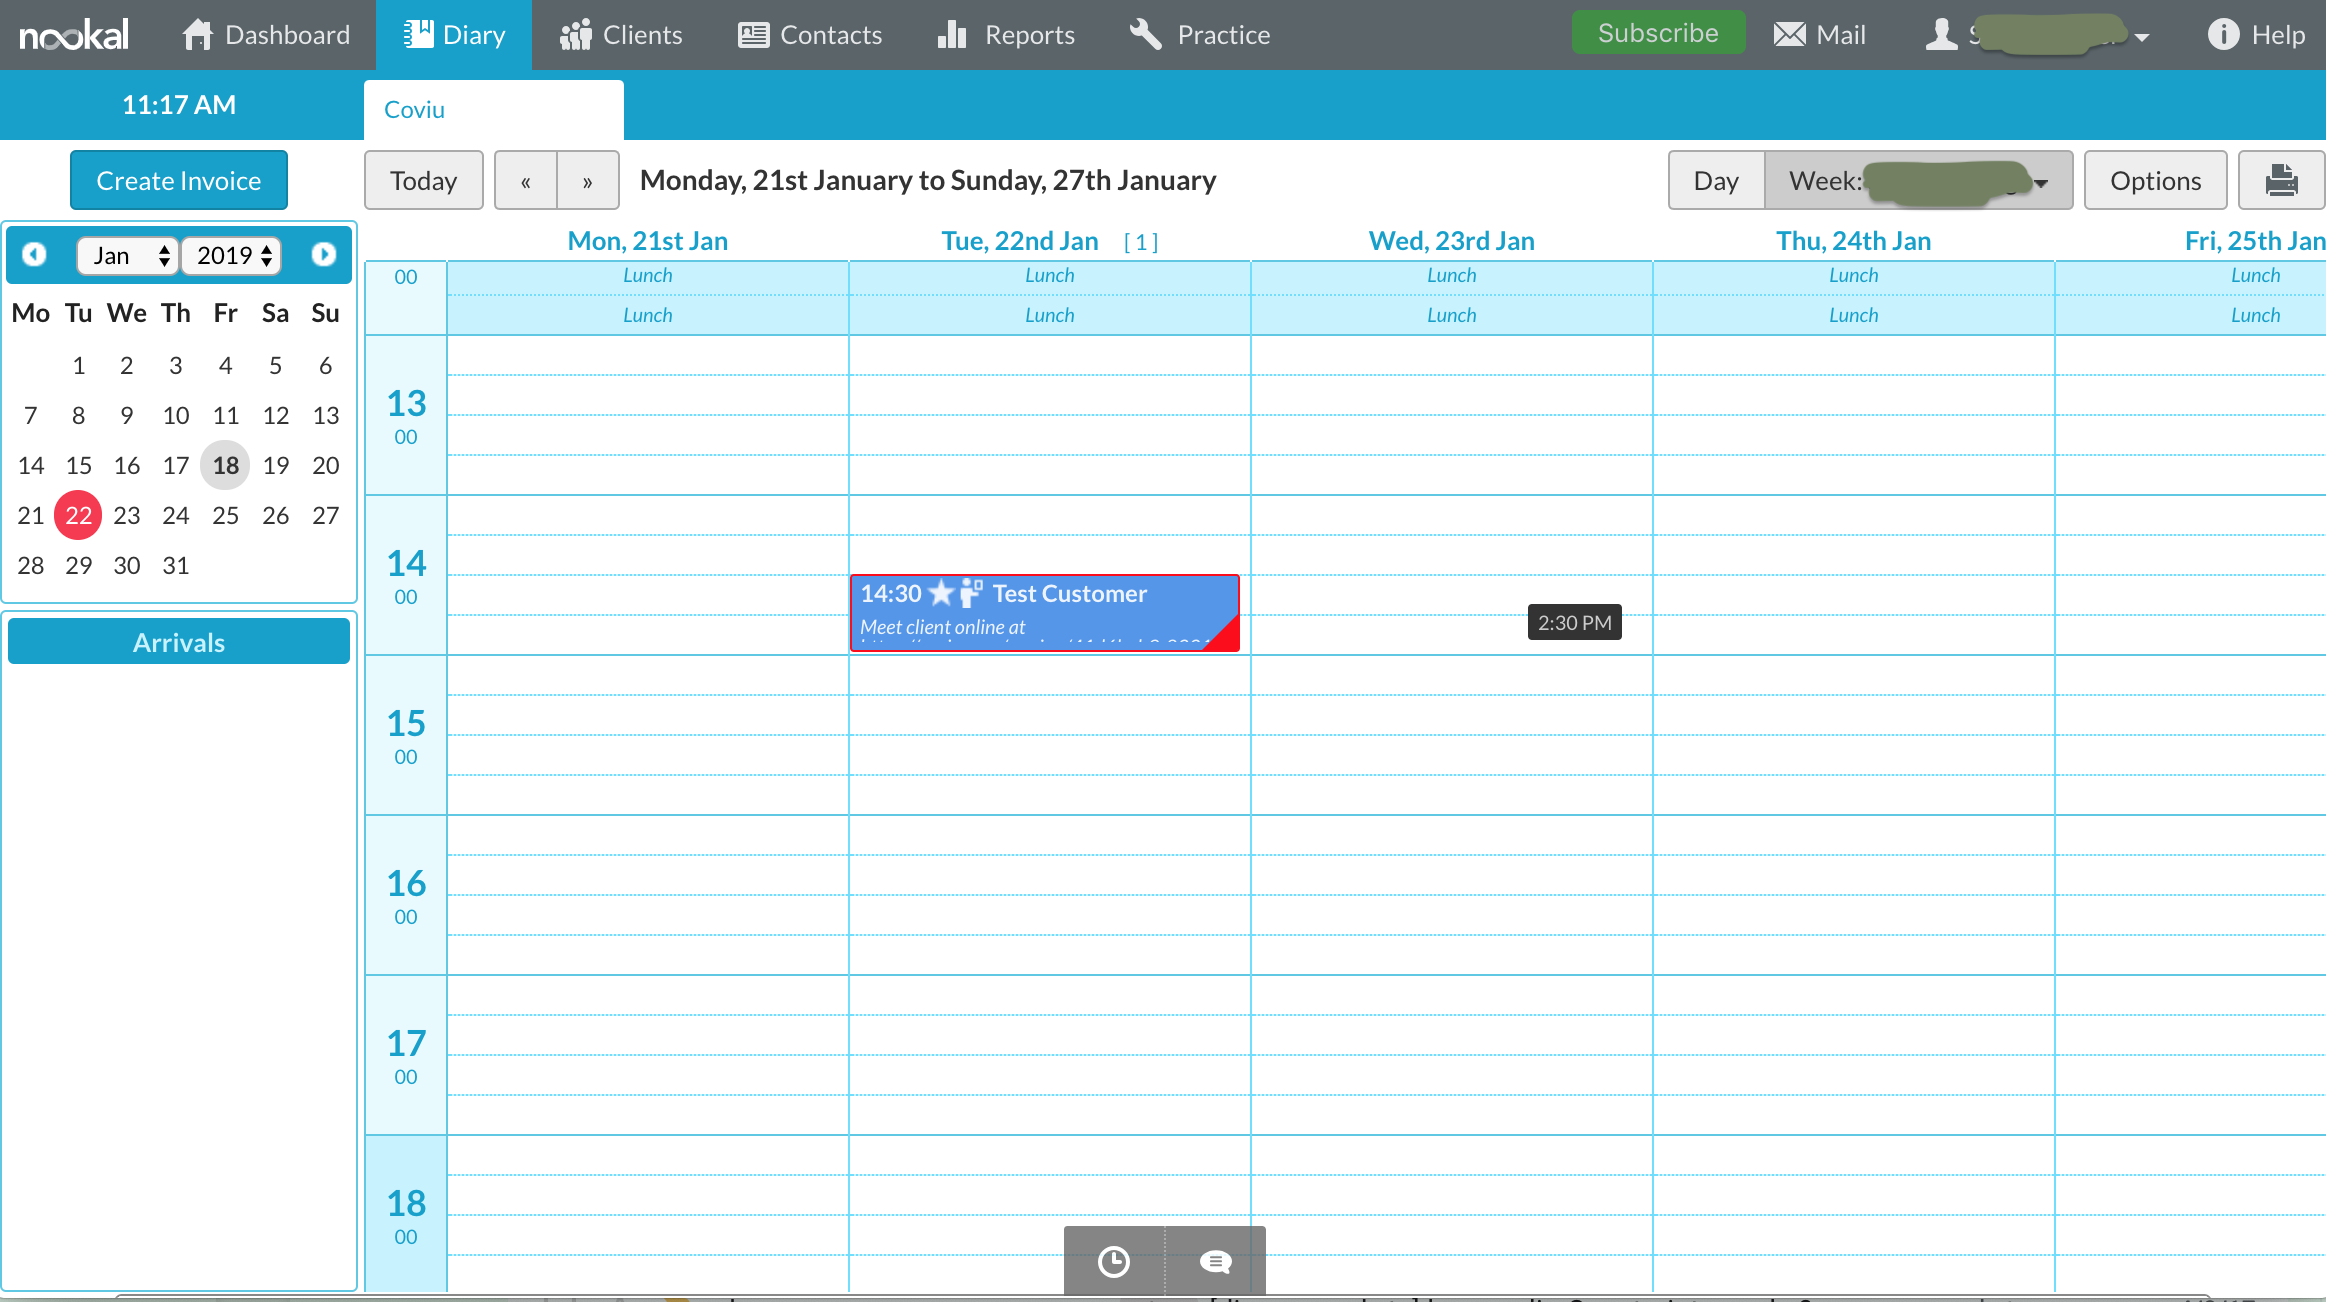
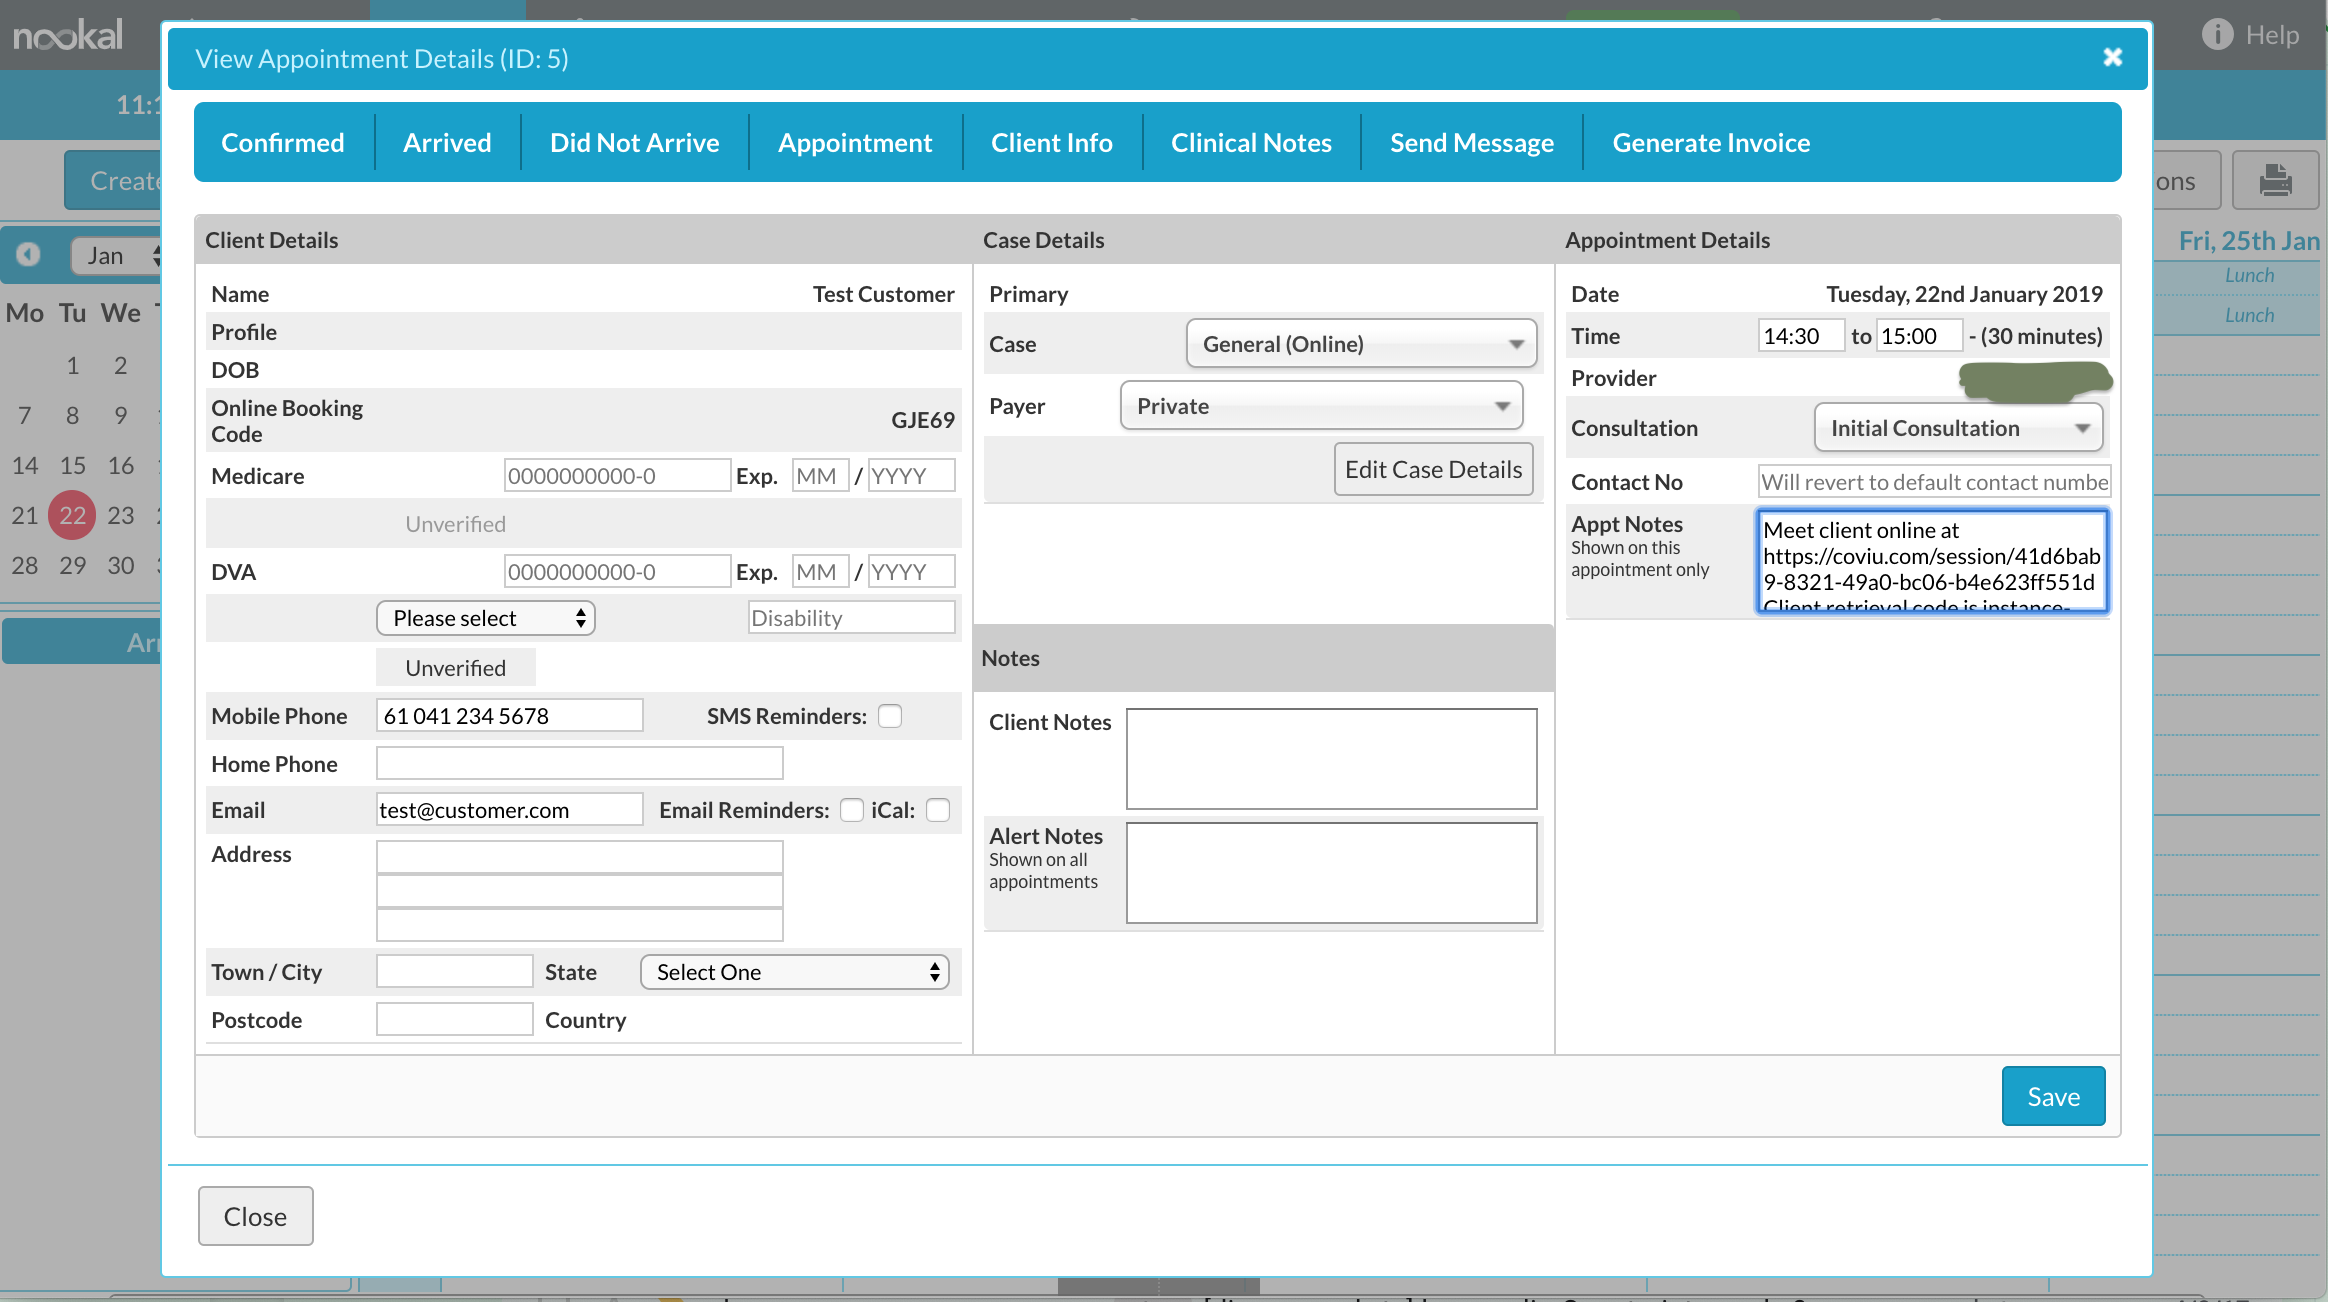
And here are the booking details:
How do I set up the Coviu - Nookal integration?
Step 1 - Configure your Nookal account
- First let's talk about some pre-conditions in Nookal. You will have to have set up the following before Coviu's integration is able to extract booking information from Nookal:
- a practice location
- staff - make sure they are active providers, have a diary, and that integrations are activated
- services - make sure that integrations are activated
- staff schedules - without these, you cannot book staff
- online bookings - activate the practice location for online bookings and make sure to select services and providers that offer these bookings
- API keys - finally, set yourself up with an API key, so we can enter this into Coviu to allow Coviu to make bookings in Nookal for you.
- In Nookal;
- Go to Menu or in the top bar, click Setup > Connections > API Keys.
- Click on the Generate API Key button.
- Select the Locations you want to allow this API Key access to.
- Toggle the Status switch to enable the API Key.
- Enter a descriptive Note about what app or service is using this key.
- Click on the Save Changes button.
- Copy the API Key so you can paste it into the appropriate field in Coviu.
Step 2 - Configure Coviu
NOTE: You have to be an administrator of the account to set up the integration.
- First, log into Coviu as you normally would.
- Ensure you have installed these two add-ons from our Marketplace:
- Customer Connect
- Appointment Bookings
- Note: Check for any costs associated with these add-ons dependant on your subscription
- Click the Add-ons menu on the left hand side to check if you have these already.
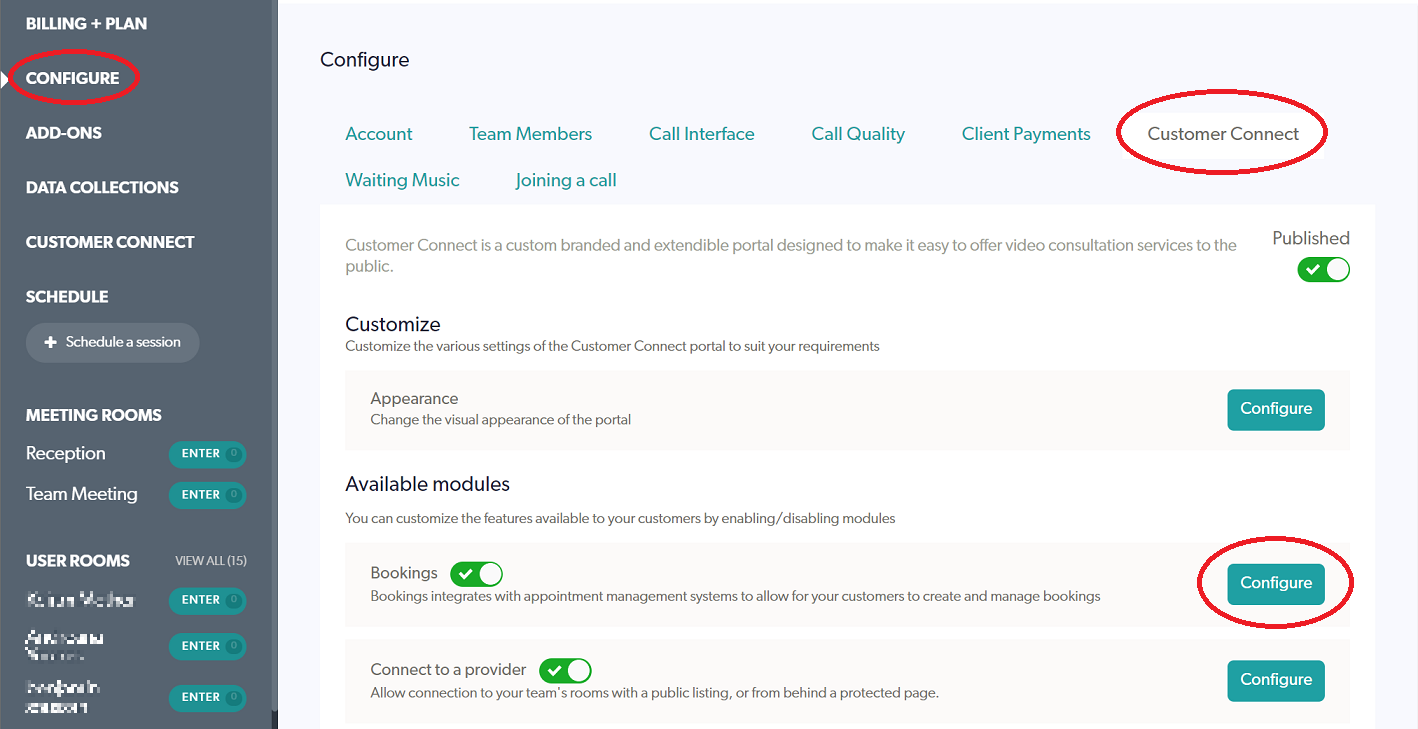
- Once installed, click Configure in the left hand menu (if you can't see the Configure menu, you are not the Administrator for your account)
- Click the Customer Connect tab.
- Click Configure to the right of Bookings.
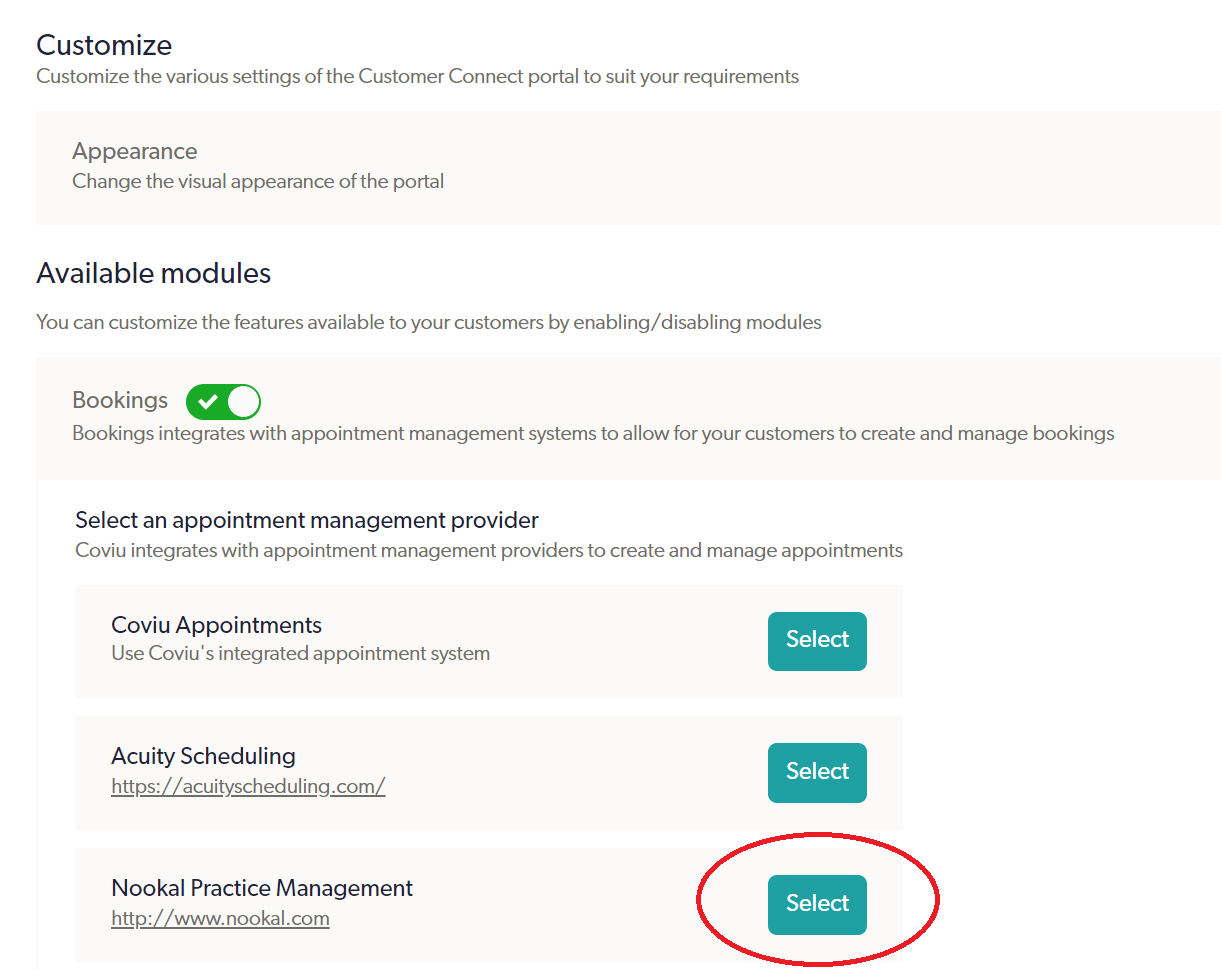
- Click Select next to Nookal Practice Management.
- Paste the API key you copied from Nookal earlier into the Nookal API Key field.
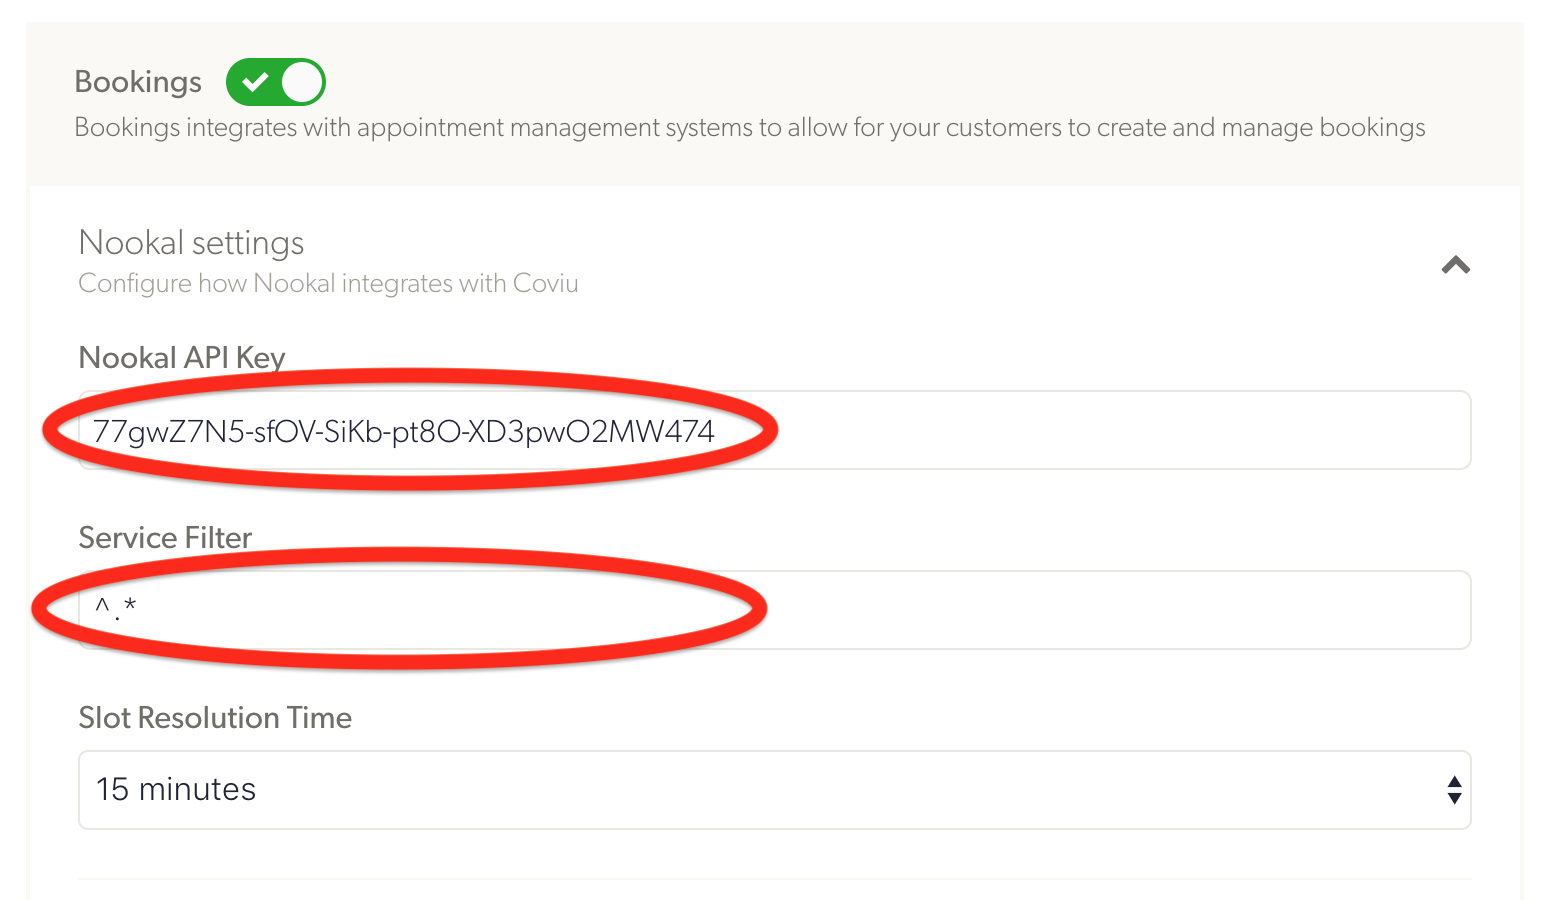
- The Service Filter allows you to filter out specific "Services" from Nookal, e.g. if you only want to display telehealth services in Coviu. If you want to display all of them, just enter "^.*". This is a regular expression that allows all Services to be displayed.
- Next you can set up some booking options including defining your lead time for bookings, what your services should be called, and what text is displayed when no bookings are available on a particular day:

- Any custom fields you add will end up in the Notes field in the appointment booking.
Step 4 - Set up the Coviu Confirmation Email
- Next you can customise the email that is being sent out for a booking:
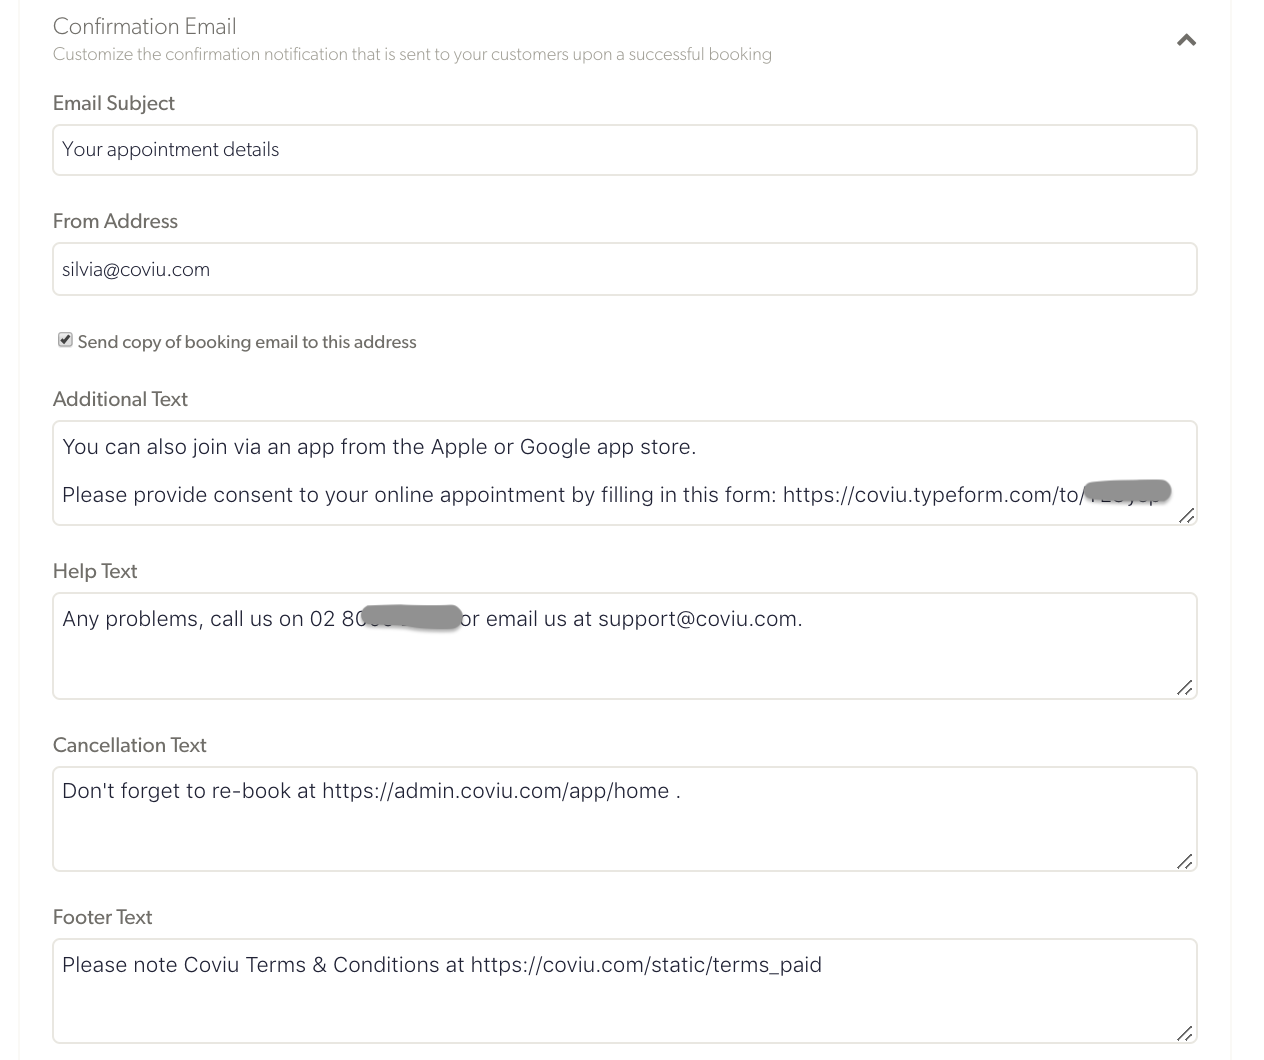
There are several fields that end up in different areas in an invitation email:
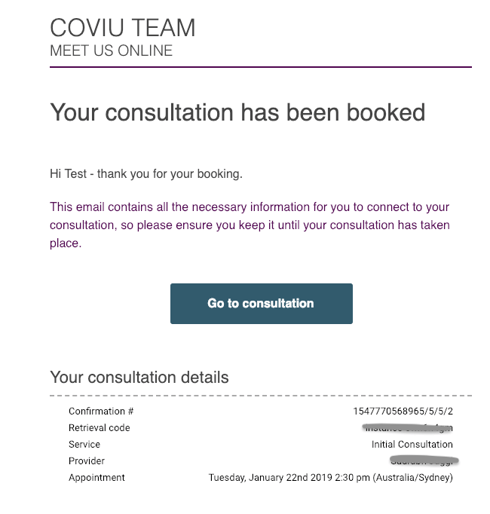
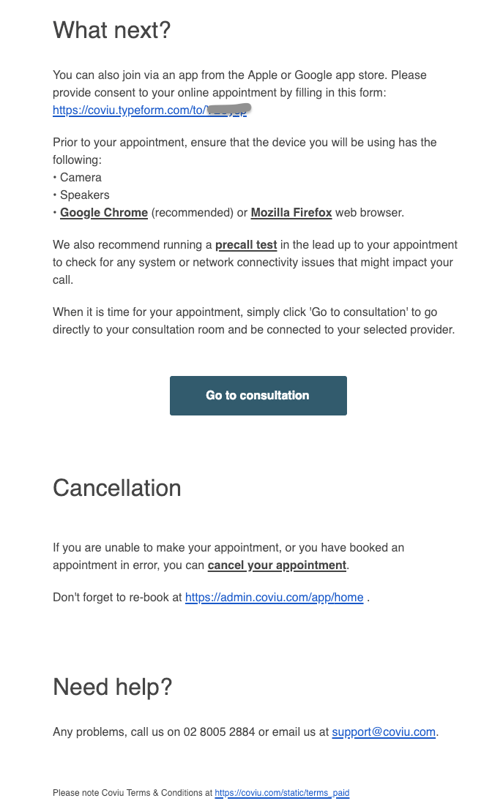
Fill in what makes sense for your company.
2.4. Sharing
Finally, we provide some HTML code to help you set up the online appointment booking button for your site:
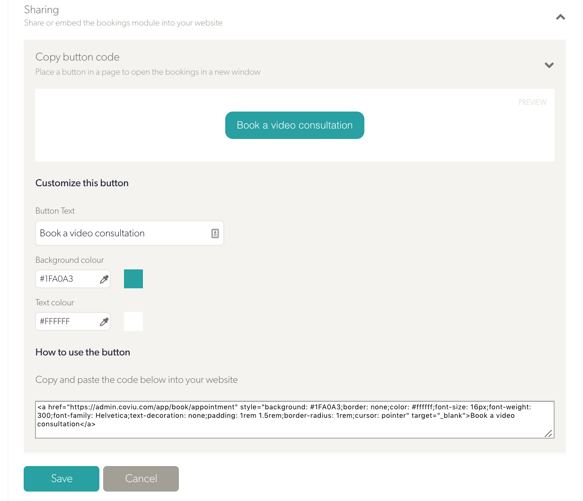
Once you have adjusted the text and colours and made this button available on your Website, your clients are able to start booking into Nookal:
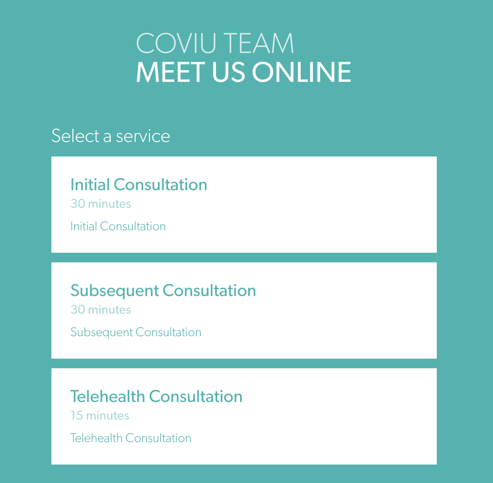
You can do this either via the Customer Connect link:
https://[subdomain].coviu.com/app/home
or directly with the booking link: https://[subdomain].coviu.com/app/book/appointment
Don't hesitate to reach out if you have any issues with this setup process!