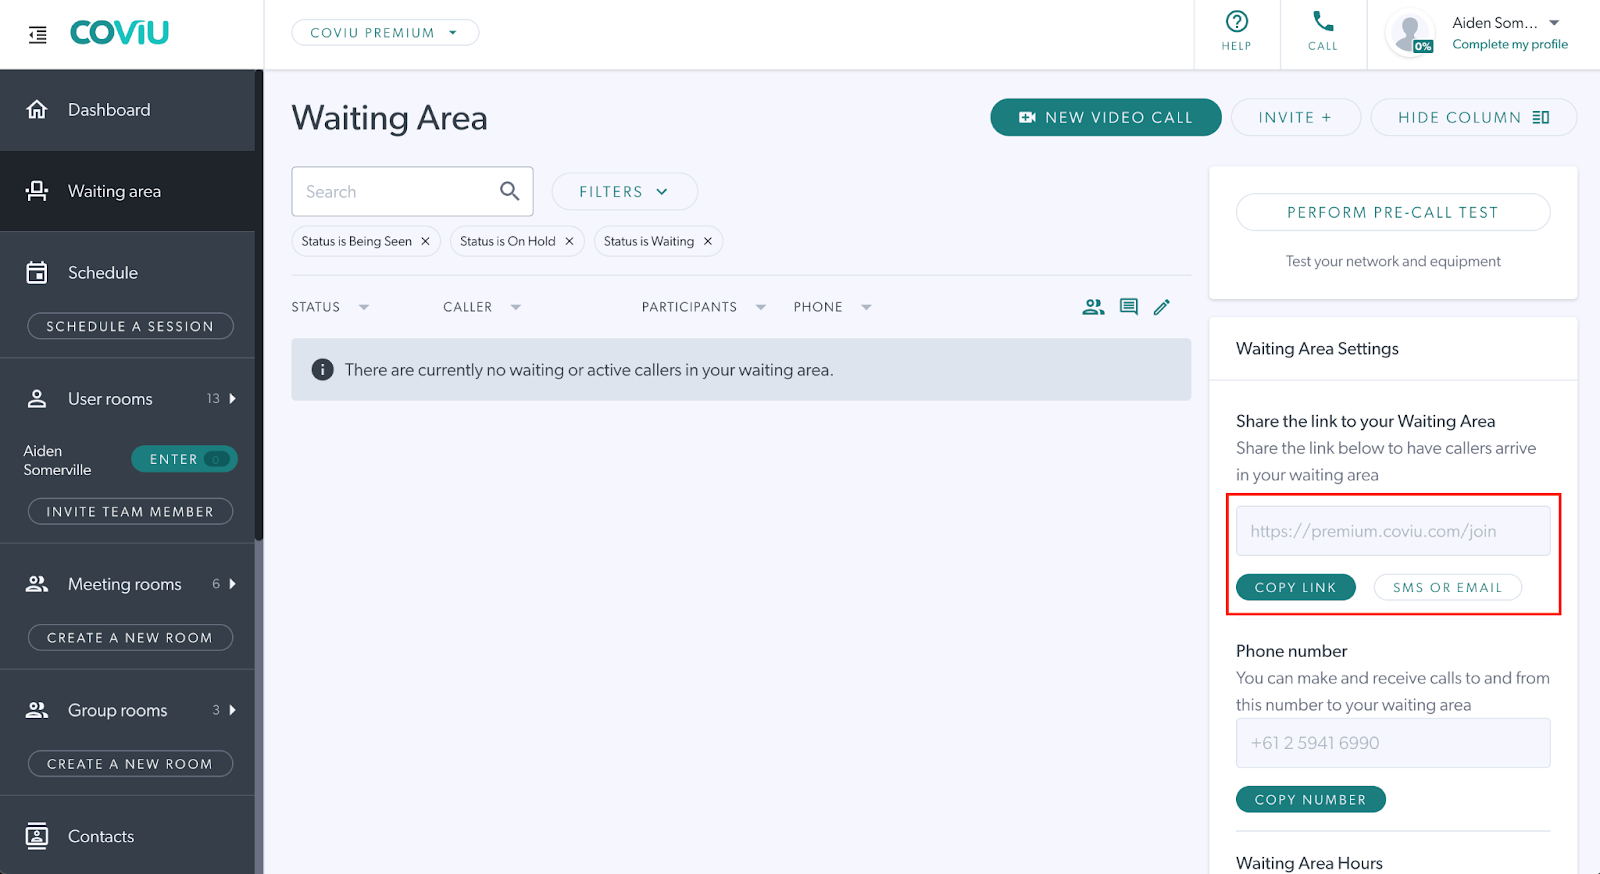
Step 1: Retrieve Your Coviu Waiting Area Link
Before setting up appointment reminders in Best Practice, first, access your Coviu Waiting Area link. This is the link your patients will use to join their telehealth appointments.
Note: If you haven’t created a specific "telehealth" appointment type yet, click here for instructions.
Step 2: Open Appointment Reminder Settings in Best Practice
- Open Best Practice (Bp Premier).
- Go to Setup.
- Select Configuration.
- Navigate to the Bp Service icon.
- Tick Use BP Service for sending automated appointment reminders and click Configure Appointment Reminders.

This is where you can configure how and when appointment reminders are sent to patients.
Step 3: Select or Create a Reminder Schedule
-
Choose an existing reminder schedule to edit, or create a new one.

-
Configure the reminder timing (e.g. how many days or hours before the appointment the reminder is sent).

-
Select the delivery method (SMS and/or Bp App).
Step 4: Add Your Coviu Link to the Reminder Message
-
Open the message template for the reminder.
-
In the message body, paste your Coviu Waiting Area link.

-
You may also include placeholders for appointment details such as date and time.
Example message:
“Your appointment is scheduled for [Date/Time]. Please join your telehealth session using the following link: [Coviu Waiting Area Link]”
This ensures patients can easily access their Coviu session directly from the reminder.
Step 5: Save and Test the Reminder
- Save your changes.
- Create a test appointment to ensure the reminder is sent correctly.
- Confirm that the message includes the Coviu link and that it directs correctly to the Waiting Area.