As a user of AcuityScheduling, you will want to keep all your scheduling information centrally in AcuityScheduling.
This is particularly important if you want to do in-person sessions as well as online sessions.
We've made it possible for you to make online appointment bookings through Coviu into the AcuityScheduling calendar. This means you will use the AcuityScheduling calendar for in-person appointments and Coviu for online appointments.
Before you get started
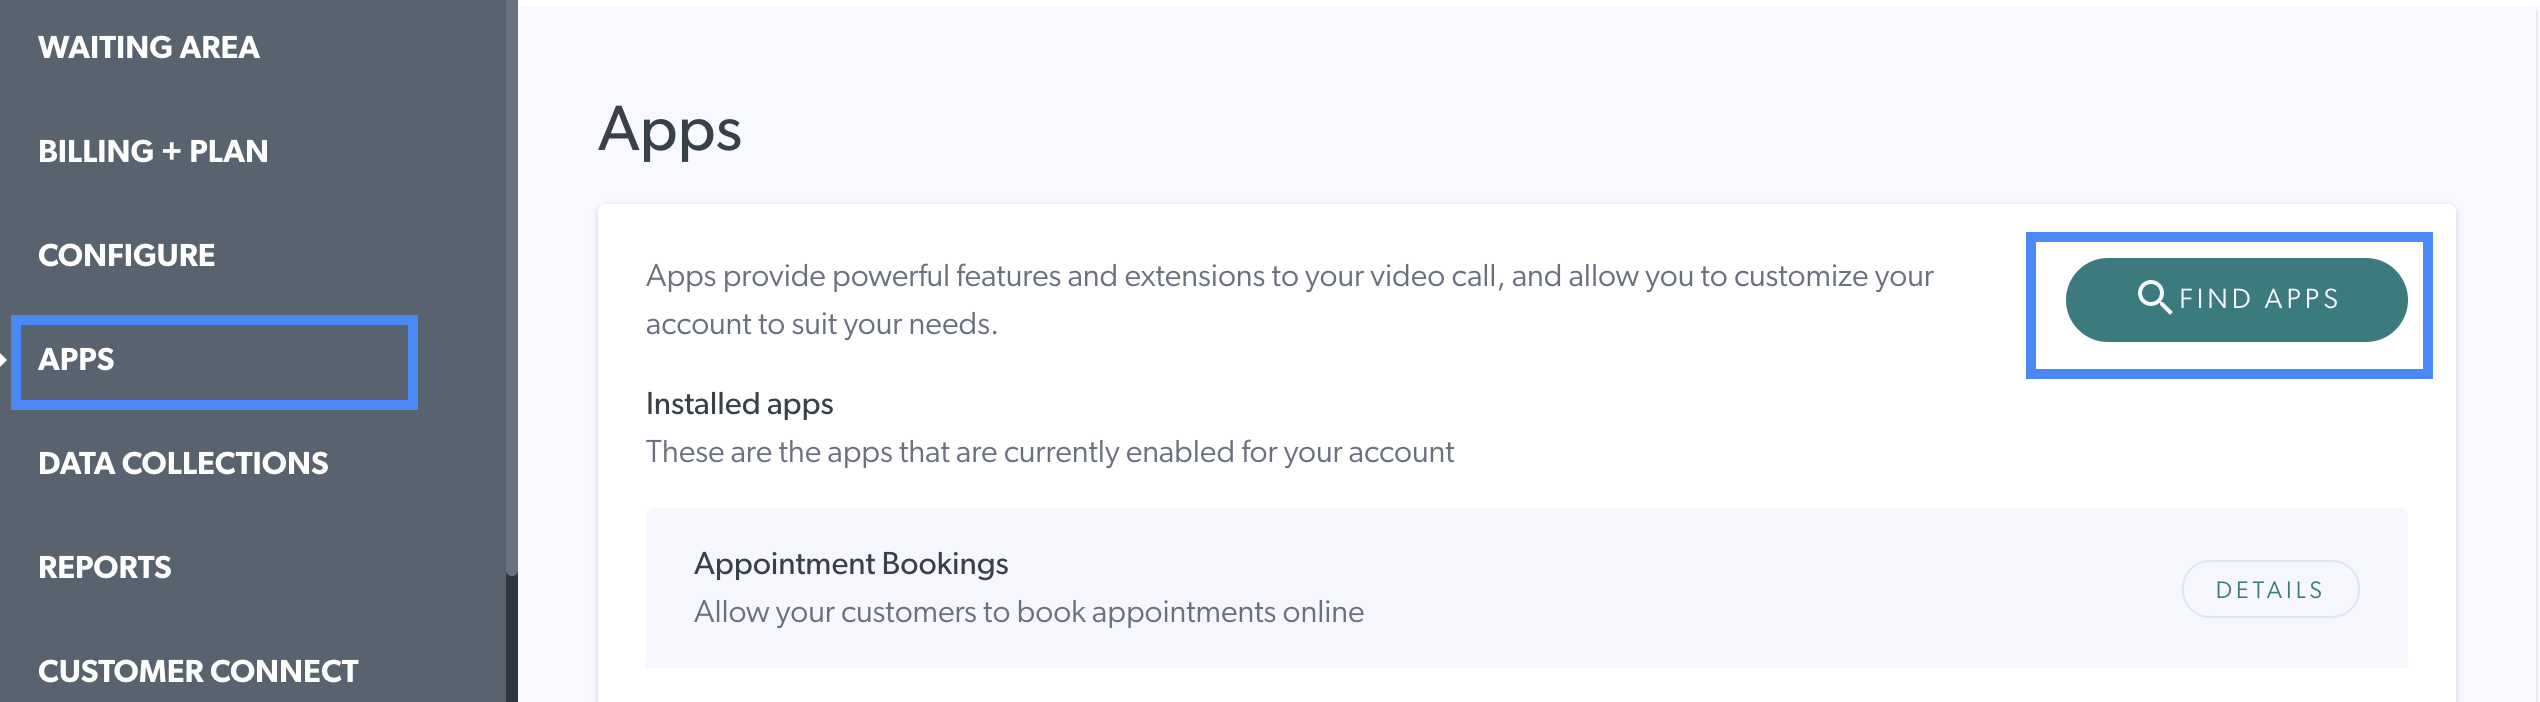
You'll need to install the Customer Connect and Appointment Bookings Apps on your Coviu account.Once here you can click on the Find APPS button and head to the App Marketplace.
Step 1 - Enable AcuityScheduling bookings in Coviu Customer Connect
- Navigate to the APPS menu and click on the Customer Connect tab
- Enable the Bookings toggle, and click Configure
You'll notice that you can activate AcuityScheduling here. Click Select.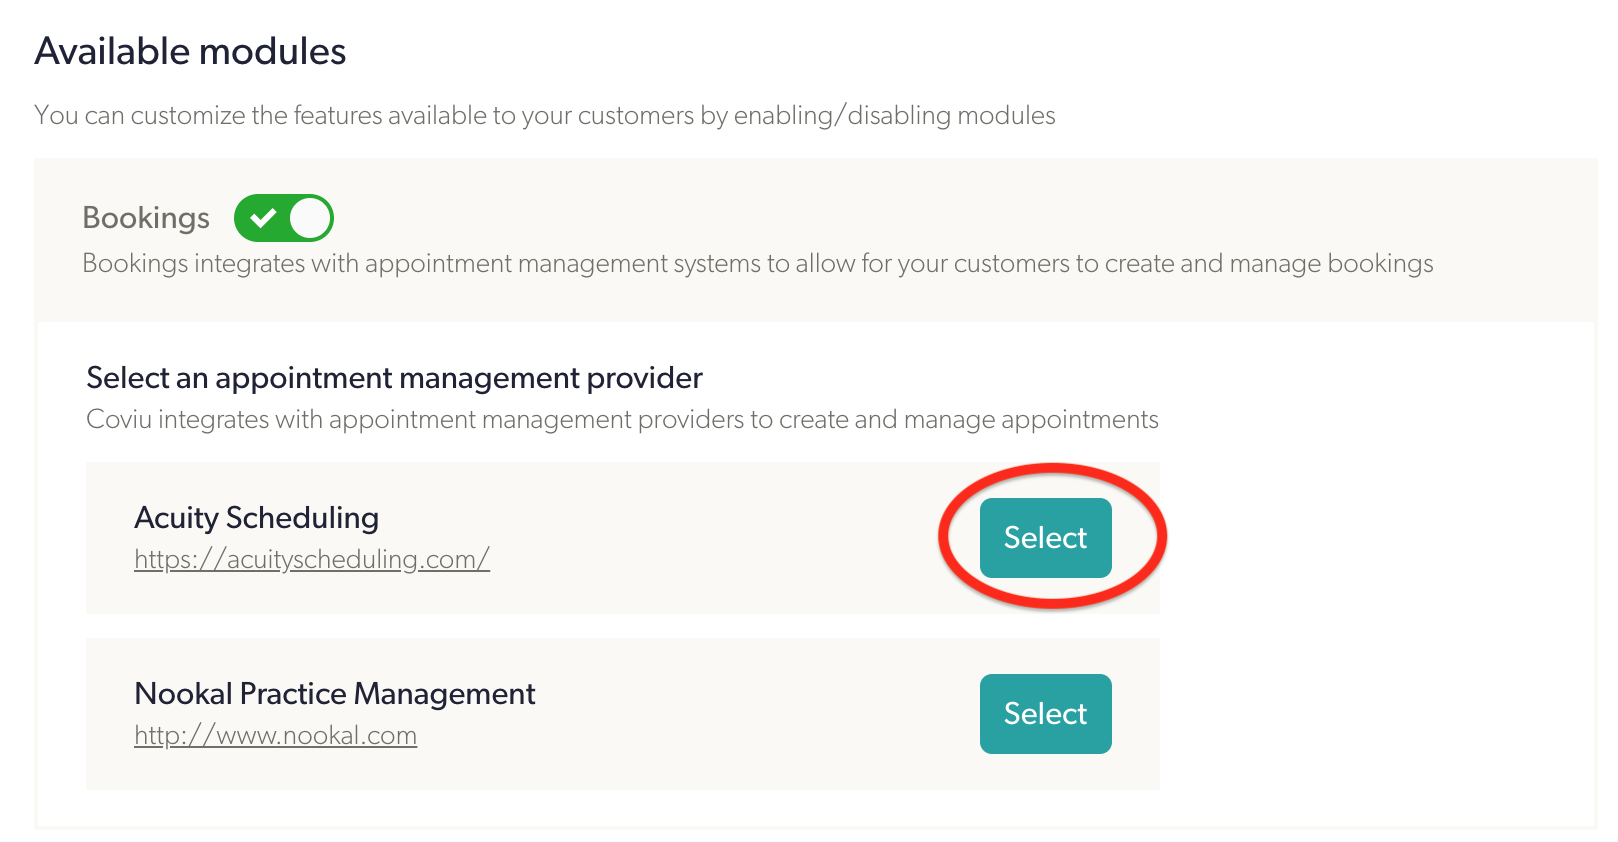
Step 2 - Connect your AcuityScheduling account to Coviu
We support two methods for connecting your AcuityScheduling account with Coviu:
- OAuth2
- AcuityScheduling API
For most cases, authenticating with OAuth2 will be sufficient, and will work on any AcuityScheduling plan. Here, we'll show you how to connect your account via OAuth2, but if you would prefer to use the API, just click the "Have an API Key?" button. Note that to use the AcuityScheduling API, you will need to be on their Powerhouse plan.
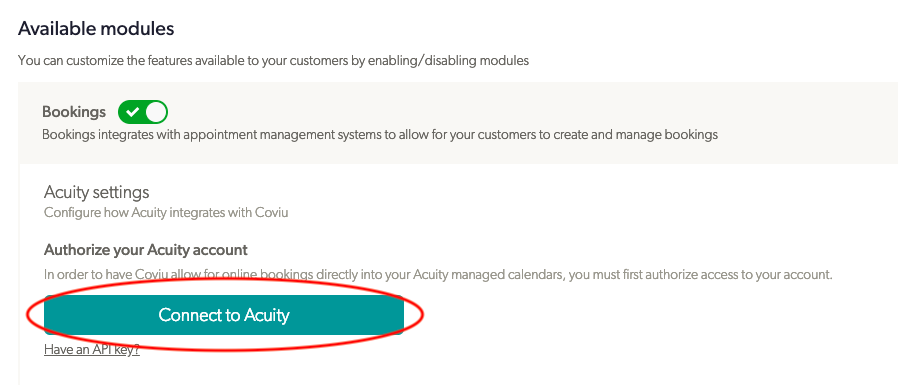
Click Connect to Acuity. You'll be redirected to the AcuityScheduling website.
Enter your AcuityScheduling account details and click Allow Access. This will allow Coviu to add appointments that are booked via Coviu to your AcuityScheduling calendar.
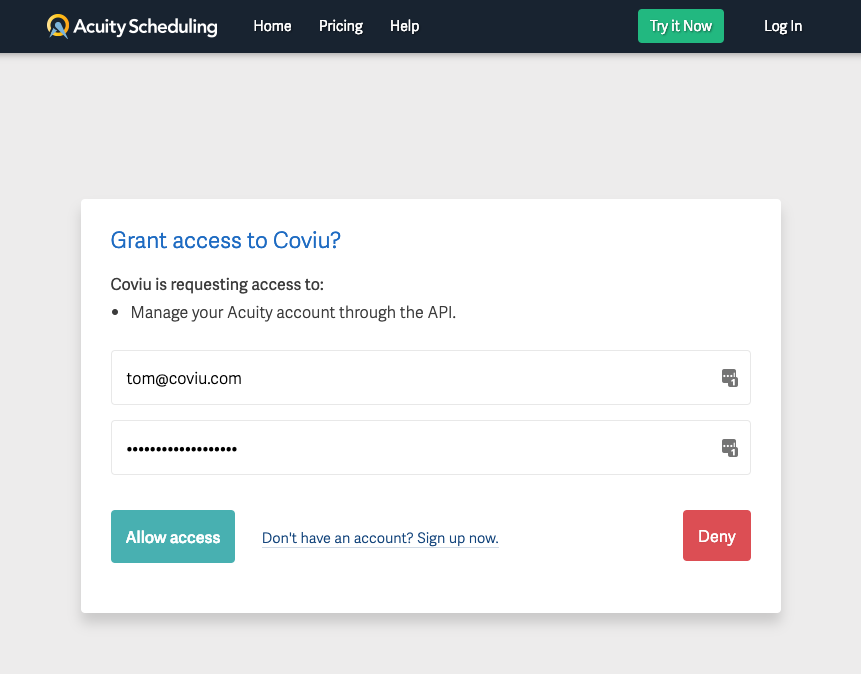
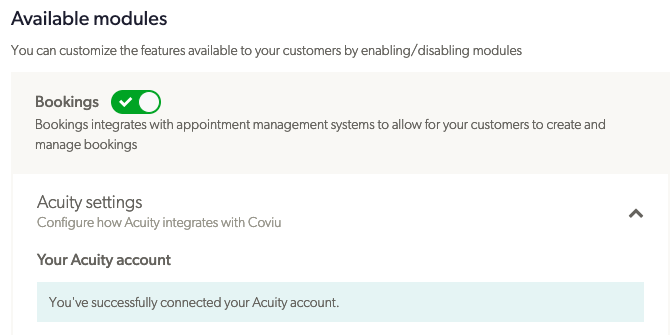
You will then be redirected back to Coviu, and if everything went smoothly, you should receive the message "You've successfully connected your Acuity account".
Step 3 - Set up AcuityScheduling
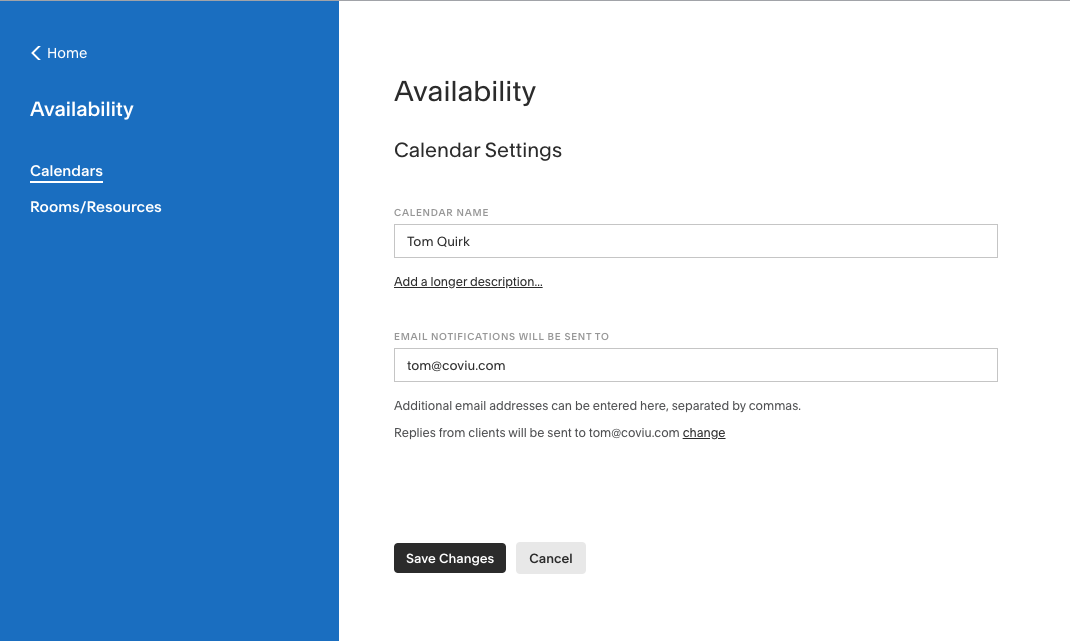
Patients will be able to select which practitioner they would like to book an appointment with. You'll need to change the AcuityScheduling Calendar name in AcuityScheduling for the practitioner's name to appear for the patient.
- Navigate to the Availability page (from the sidebar). Here, you'll see a list of calendars associated with your account
- Locate the calendar you'd like to update, and click Calendar Settings
- Update the Calendar Name to the practitioner's full name
- Update the Email Notifications field to the practitioner's email address
Step 3.1 - Update your email template
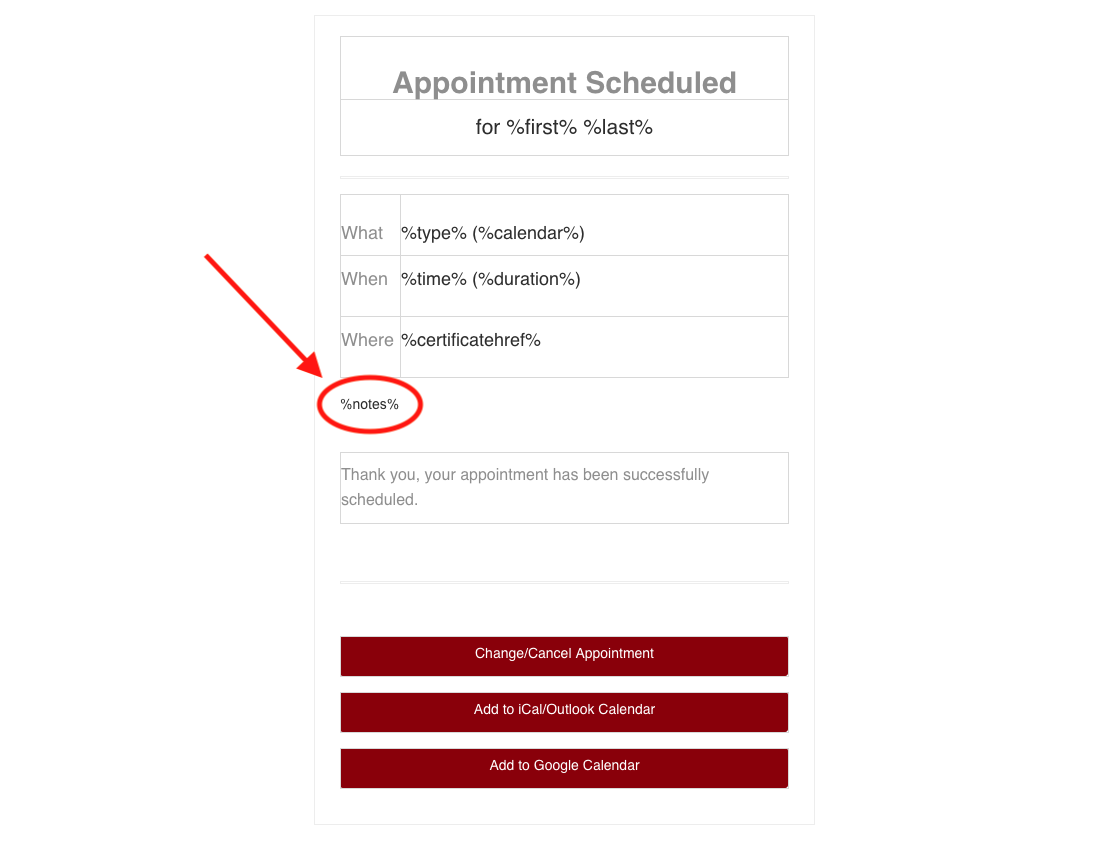
Coviu conveniently puts the link to the Coviu session in the Notes section of the AcuityScheduling appointment. So that your patients (and your practitioners) can see this link in their email notification, you'll need to update your email template to include %notes%.
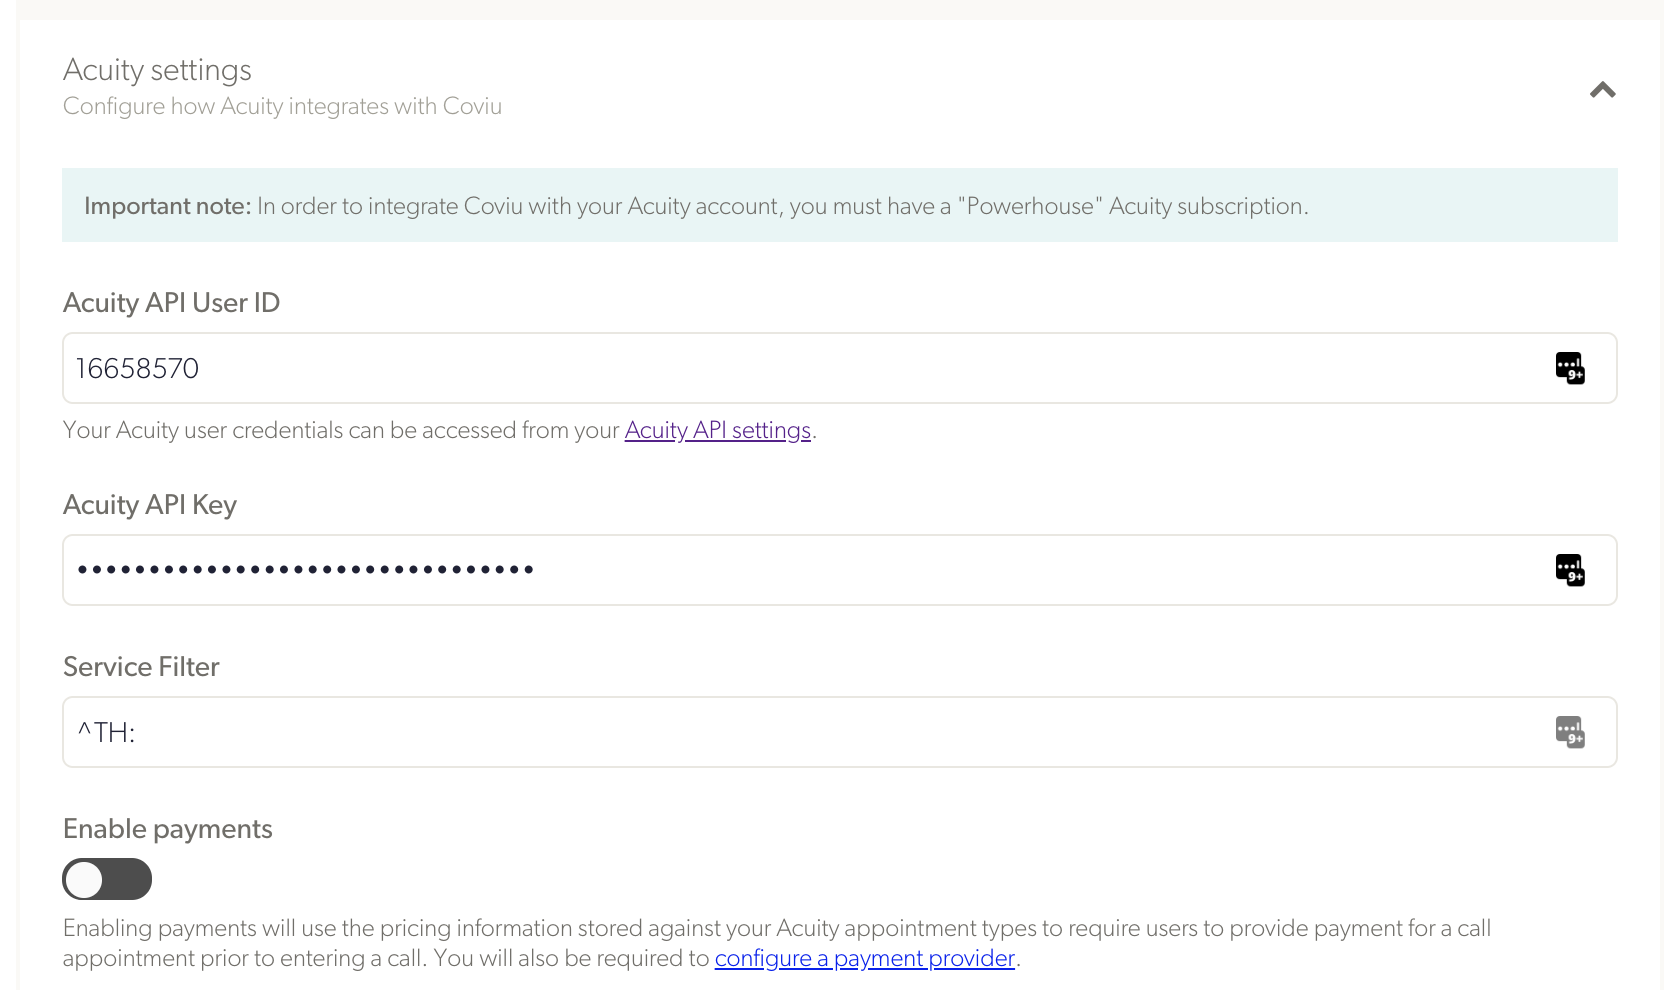
Step 4 - Configure AcuityScheduling in Coviu
The Service Filter allows you to filter out the online appointment types that you have defined in AcuityScheduling and only book them through Coviu, while the rest continues to be booked through AcuityScheduling.
For example, you might have set up your Appointment Types in AcuityScheduling as follows:
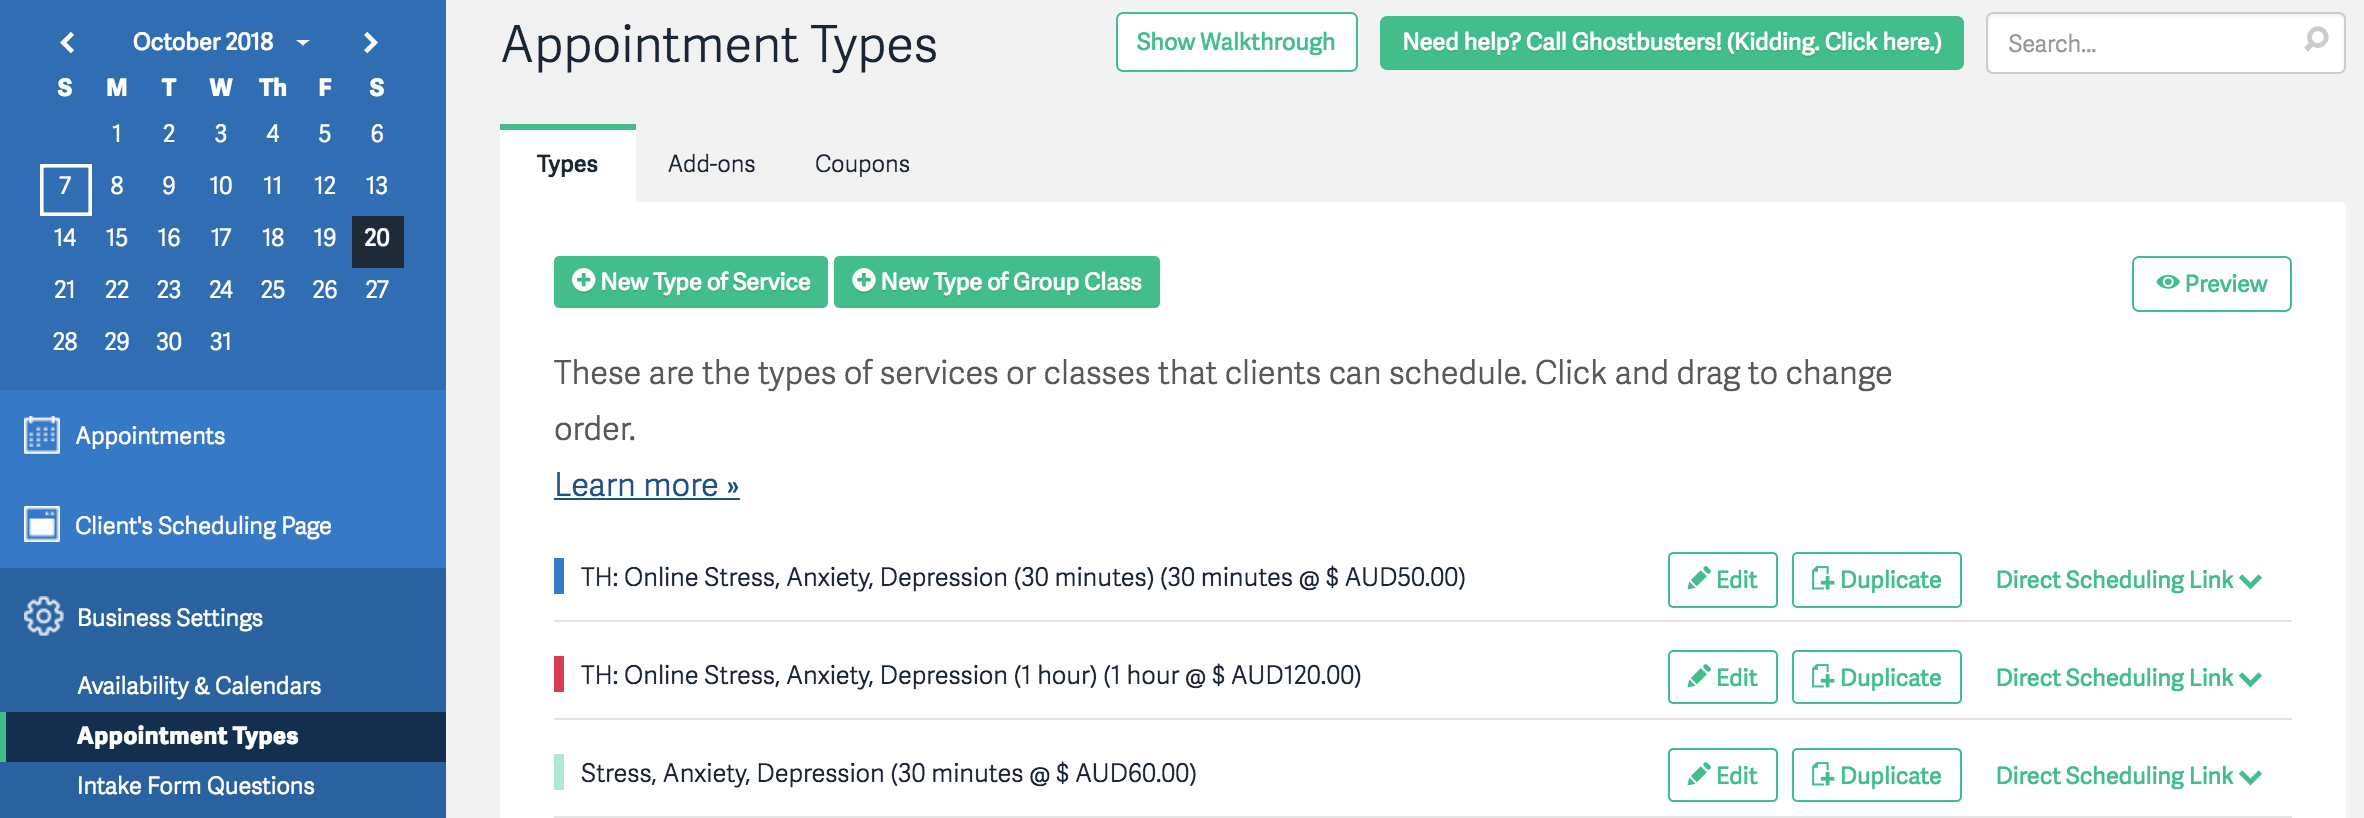
The ones that start with "TH:" are the online appointments, while the others are the in-person appointment types. Then you enter into the service filter the following string (without the quotation marks ): "^TH: ".
This will filter out all the appointment types that begin with the string "TH: " and list them in Coviu.
You can set up the other "Booking Options" and "Confirmation Email" details and under "Sharing" create a button to add to your Website. That button takes you to https://[yourdomain].coviu.com/app/book/appointment, which will look something like this:
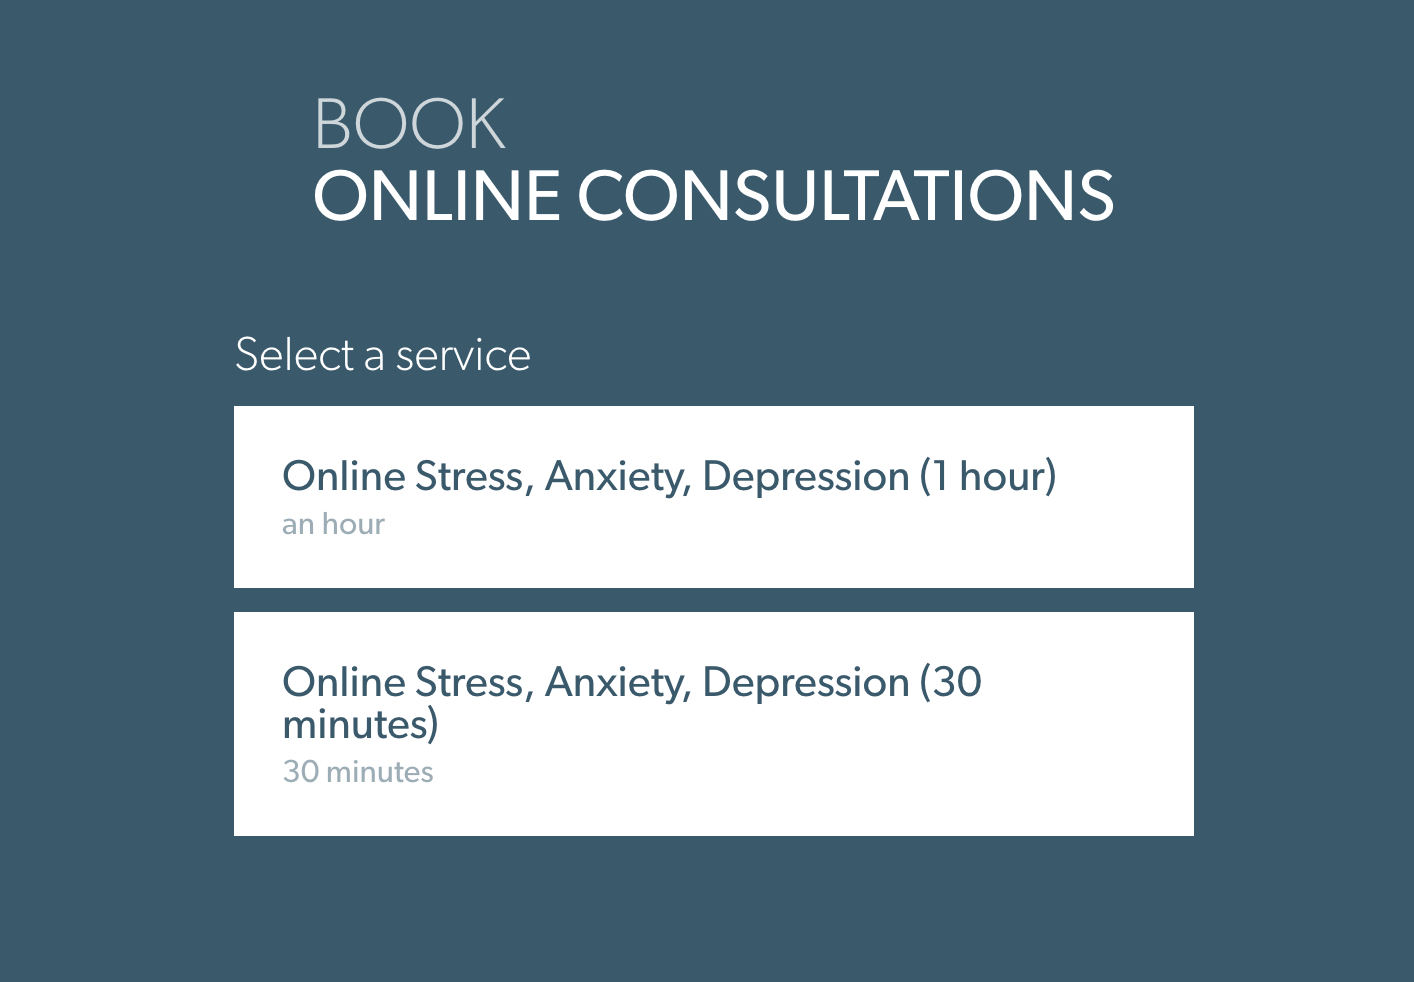
You can see how the two services that started with "TH: " were extracted from AcuityScheduling, while the others were not.
When an appointment is made via these buttons, all the information ends up in AcuityScheduling.
You have completed another Coviu help article. You now know how to set up and use AcuityScheduling for Coviu appointment bookings
If this is not what you were looking for, explore our knowledge base and search for another article from here.
If you still require any assistance, please do not hesitate to get in touch with our friendly Customer Success team using any of the contact methods available here.