How to Integrate Coviu and AdvanceMD
This article describes the Coviu and AdvanceMD integration and how to connect the two systems together.
Last Updated: June 2023
On this page:
How to set up Coviu link integration with AdvanceMD
These steps must be completed prior to scheduling consultations.
- Copy the URL from the browser address bar.
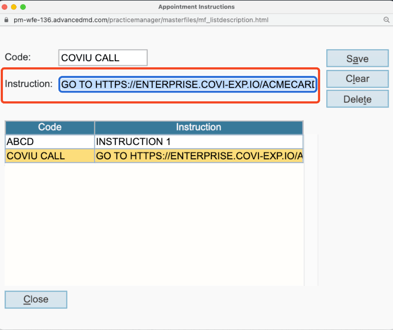
(e.g. https://myplatform/t/clinicname/team/waiting-area) - In AdvancedMD PM, create an “instruction” by going to
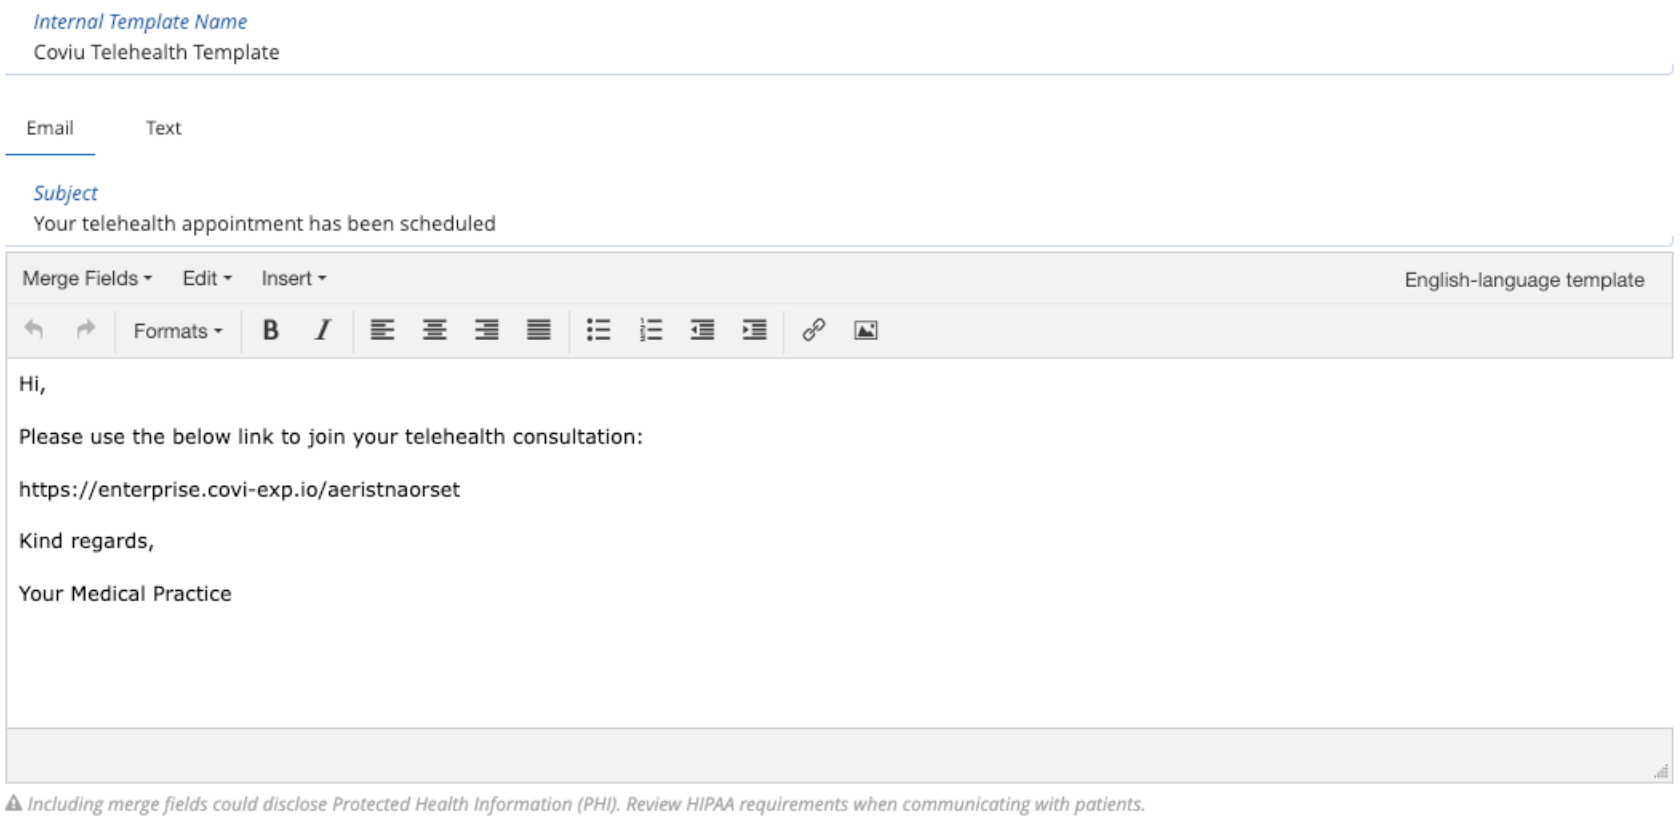
System Settings> Appointments >Instruction Setup. Type a brief instruction and paste the link from above. - Create an email template for notifying patients of their telehealth call, by going to System Settings >Templates >Automated Messaging & Reminders. Be sure to include a link to the clinic, and to fill out both the Email and Text versions of the message. Set other notification settings (e.g. reminder timing information) as needed.
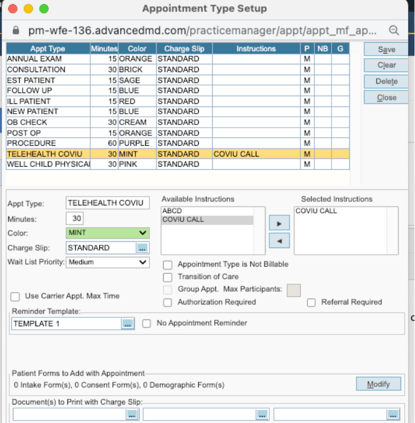
- Create a Custom Appointment Type by going to System Settings> Appointments>Appointment Types. Add the Instruction and Reminder Templates created in previous steps.
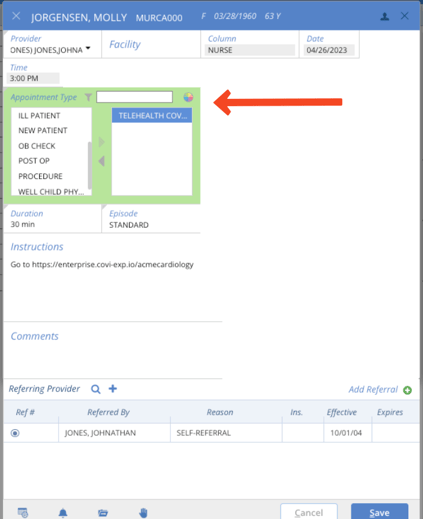
- When creating a telehealth appointment, select new Appointment Type.
Note that the Instructions from above are added automatically.
- From here, the patient will receive a reminder email at the schedule configured in the Automated Messaging & Reminders.
Note:
- When the clinician opens the appointment at the start of their consultation, they will see the instruction and will be required to visit that URL. Then, they will log in to Coviu and join the patient in the Waiting Area Queue.
- The login process for clinicians will be streamlined through the "WebLinks" menu in AdvancedMD, where a clinician can quickly access the Coviu Waiting Area to pick up a patient, thereby eliminating the possibility of entering the incorrect Coviu Waiting Area.
More support options
You have completed another Coviu help article. You now know how to integrate Coviu with AdvanceMD.
If this is not what you were looking for, explore our knowledge base and search for another article from here.


