This article describes how to set up and manage voicemail for the Coviu Phone feature.
Last Updated: June 2023
Note:
- You need the Coviu Phone set up and provisioned on your Coviu account to enable this feature; click here to learn more.
- To set up voicemail for Coviu Phone, you need to be the Coviu account Owner or Administrator.
- The maximum length of voicemails is 30 seconds. If your caller remains silent, then the maximum length is reduced to 10 seconds.
On this page:
- How to enable and configure voicemail for Coviu Phone
- How to retrieve and action voicemail recordings
- More support options
How to enable and configure voicemail for Coviu Phone
- Log in to your Coviu account as you normally would.
- Scroll down on the left side menu of the Dashboard and click Configure (if you can't see the Configure button, then you are not the account Administrator).
- Click the arrow button to the right of the tabs to find the Waiting Area tab. Click Waiting Area.
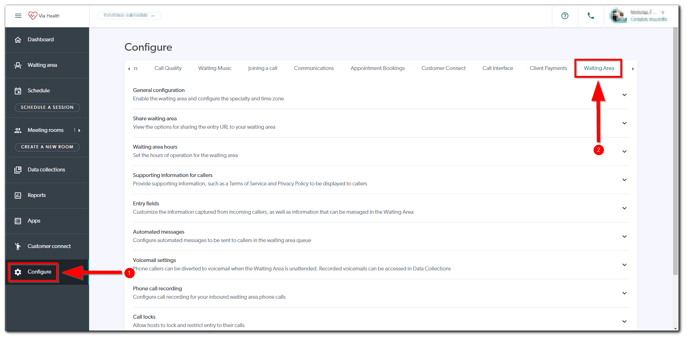
- Click Voicemail settings.
- Toggle the Enable voicemail button to the on or green position.

- Then, you will need to create scenarios in which voicemail is supported:
- When call status is waiting:
- When your client or patient has been waiting for a period of time, the call can be automatically routed to voicemail. They will hear the message after the delay (in seconds) that you have configured and then they can leave a voicemail message.
- If a delay of 0 seconds is configured, your client or patient will immediately be transferred to voicemail.
- Your client or patient will still hear the standard clinic message before the voicemail message.
- You can set up multiple messages, but only one can be active at a time.

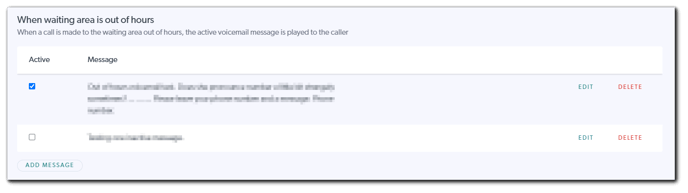
- When Waiting Area is out of hours:
- If your client or patient calls your clinic when it is closed, they will hear the message that you have configured and then they can leave a voicemail message.
- Your client or patient will still hear the standard clinic message before the voicemail message.
- You can set up multiple messages, but only one can be active at a time.
- Click here to learn how to set your clinic operating hours.
- When call status is waiting:
- Scroll down and click Save.
Note: You must create and activate at least one scenario in order to save and enable voicemail for Coviu Phone.
How to retrieve and action voicemail recordings
- Log in to your Coviu account as you normally would.
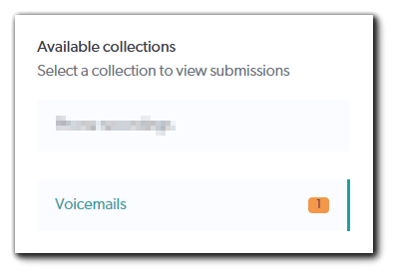
- Scroll down on the left side menu of the Dashboard and click Data collections.
- Scroll down and click Voicemails.
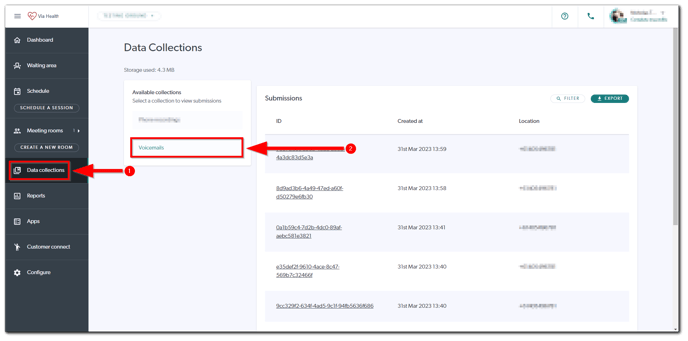
- You will be presented with a list of voicemail recordings to the right. New voicemails have their unique identifiers marked in bold.
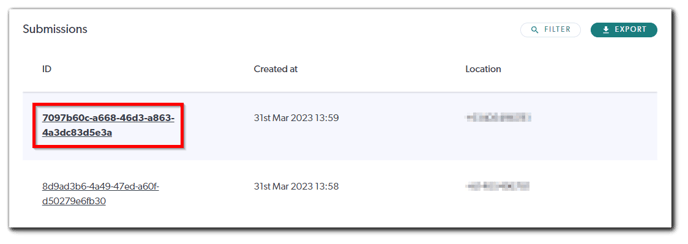
- Click on the unique identifier to access the voicemail recording. You will be presented with all of the voicemail recording information alongside the ability to play, download and mark the voicemail recording as actioned or complete.

- Once you have checked the Mark as complete checkbox for a voicemail recording, its unique identifier will no longer be marked in bold and the orange-coloured counter will decrement accordingly. You can undo this action by simply unchecking the Mark as complete checkbox.
Note:
- An orange-coloured counter will appear beside the Data collections label on the left side menu of the Dashboard and beside the Voicemails collection when there is a new voicemail.

- Deleting voicemail recordings is not possible at this stage.
More support options
You have completed another Coviu help article. You now know how to set up and manage voicemail for the Coviu Phone feature.
If this is not what you were looking for, explore our knowledge base and search for another article from here.
If you still require any assistance, please do not hesitate to get in touch with our friendly Customer Success team using any of the contact methods available here.