Last Updated: March 2023
Note:
- The Waiting Area feature is available to customers who are on these plans only:
- Standard (also the Trial plan)
- Premium
- Enterprise
- Not sure what plan you are on? Click here to find out.
- If you are on a custom Enterprise plan, you can click here to find out how to get this feature set up.
- The Waiting Area feature is different from our Waiting Room. Click here to learn the difference.
- To configure the Waiting Area, you must be the account Owner or Administrator.
On this page:
What are automated messages?
Automated messages are a great way to get messages to your clients or patients automatically while they are waiting in your virtual Waiting Area. Below are a few example messages:
- "We will be with you shortly. Thank you for your patience."
- "Please note that our clinic hours are from 9 AM to 5 PM AEDT."
- "Our clinic will be closed on a public holiday."
- "Did you know we do travel immunisations? Please ask us for more information."
How to configure automated messages for the Waiting Area
- Log in to your Coviu account as you normally would.
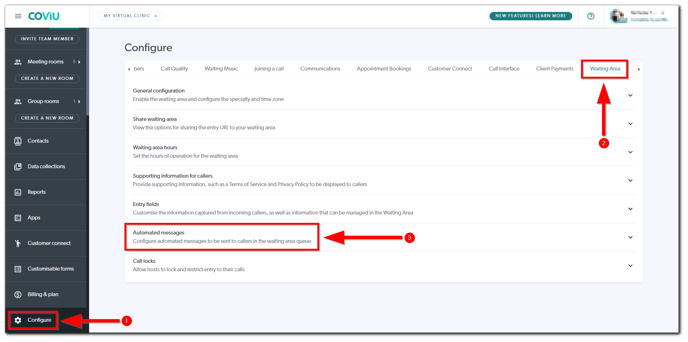
- Scroll down on the left side menu of the Dashboard and click Configure (if you can't see the Configure button, then you are not the account Administrator).
- Click the arrow button to the right of the tabs to find the Waiting Area tab. Click Waiting Area.
- Click Automated messages.
- Under When call status is "waiting" and When call status is "on-hold", click Add Message to add your automated message(s). You will be prompted to add your message and a delay in seconds (if necessary).
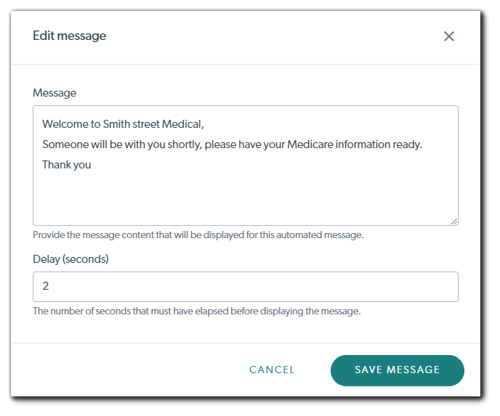
- Click Save Message.
- You can always add more automated messages by repeating the steps above. You can always Edit or Delete your existing automated messages as well.
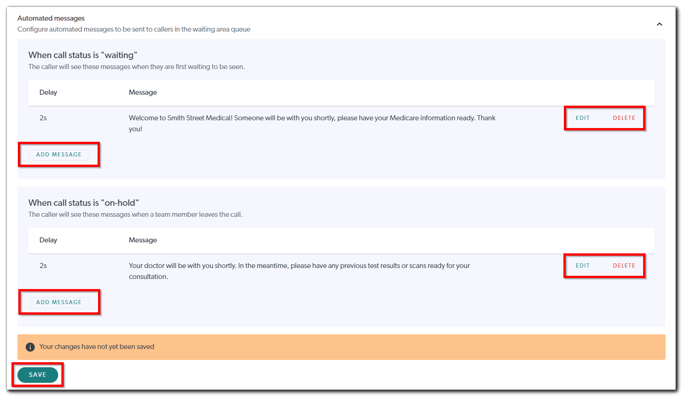
- Click Save.
More support options
You have completed another Coviu help article. You now know how to configure automated messages for the Waiting Area.
If this is not what you were looking for, explore our knowledge base and search for another article from here.
If you still require any assistance, please do not hesitate to get in touch with our friendly Customer Success team using any of the contact methods available here.