This article explains how to set up the Appointment Bookings App. This feature is great for allowing your clients or patients to book specific services and providers offered by your practice via the Customer Connect portal.
Last Updated: March 2023
Note: This feature can only be configured by a Coviu account Owner or Administrator.
On this page:
How to set up Appointment Bookings
Coviu offers an online appointment booking portal for accounts on the Standard and Premium plans. It allows your clients to book video telehealth consultations for specific services or clinicians in your practice.
Follow these instructions to set it up:
- Log into your Coviu account as you normally would.
- Download the Appointment Bookings and Customer Connect Apps from our App Marketplace.
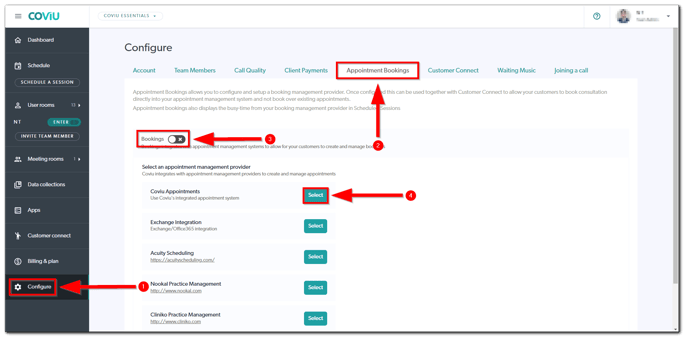
- Go back to your Coviu account and click Configure on the left side menu of the Dashboard.
- Click the Appointment Bookings tab.
- Enable Bookings and select Coviu Appointments.
- Please follow the next 6 easy steps to set up the online bookings feature.
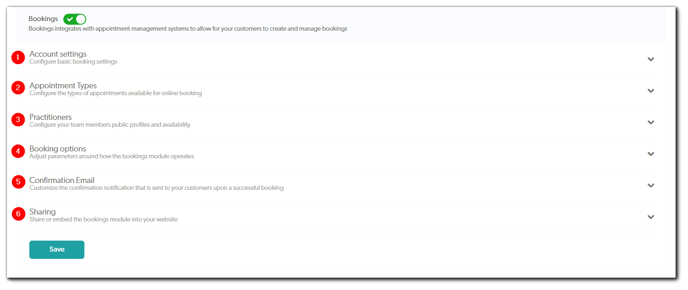
Step 1: Account Settings
There's only one setting you have to pick: it's to select the minimum duration of the sessions that you want to offer clients to book online (e.g. 15 minutes). This creates time slots for your days that clients can choose.
Step 2: Appointment Types
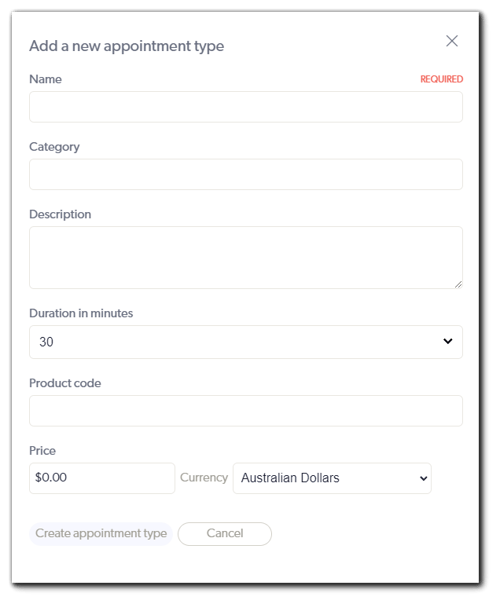
Add all the types of appointments that you want to offer to patients by clicking the
+Add appointment type button (e.g. Standard Consultation, Mental Health Appointment, Travel Vaccines, etc.) Now, you can provide details for the appointment, including a name, description, duration and price.
Note: If a price is entered, the client or patient will be requested to make a payment before they are able to enter the consultation room; they can pay any time before and up to the start of the appointment. You will also need to connect your Stripe account to take payments from your clients or patients as seen here.
 You can add as many appointment types as you wish. Simply repeat the above step to add more appointment types.
Step 3: Practitioners
Add all the practitioners from your clinic for whom you want to offer online bookings. Practitioners must be existing users of your account. Click the + Add practitioner button. Now select your practitioner and click Save.
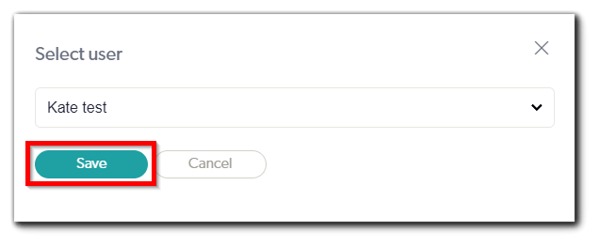 This will automatically ask you to confirm if this user is a practitioner and a calendar needs to be set up for them. Click Save.
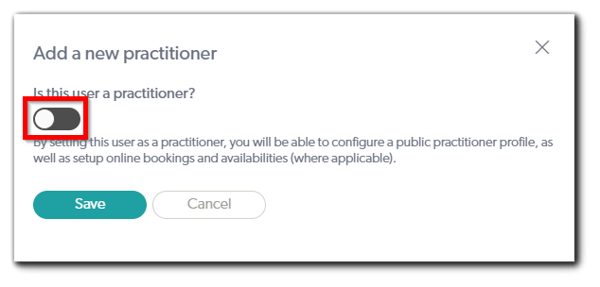 The next part is very important as it requires you to provide more details about the practitioner and lists the services they provide. Then, fill in the following details:
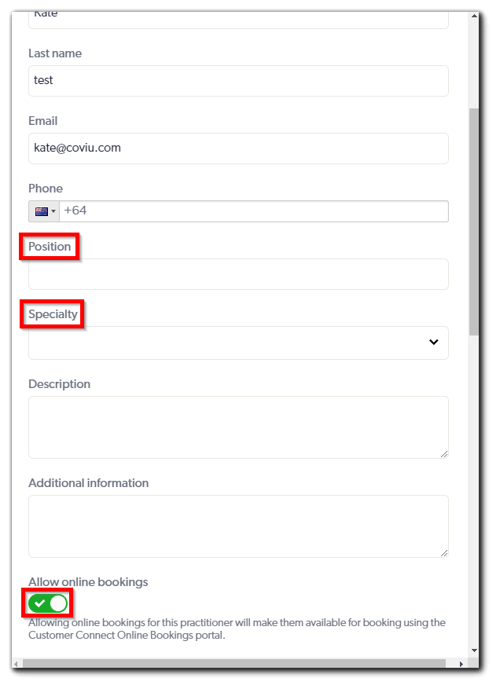
Note: You will have to enter your mobile phone number under your User Profile as seen here and set up your Customer Connect communications as seen here if you want SMS confirmations and/or reminders sent to you for your appointment bookings.
Once you have these details filled in, enable Allow online bookings for the practitioner. Then, fill in the times during which the practitioner is available for video sessions.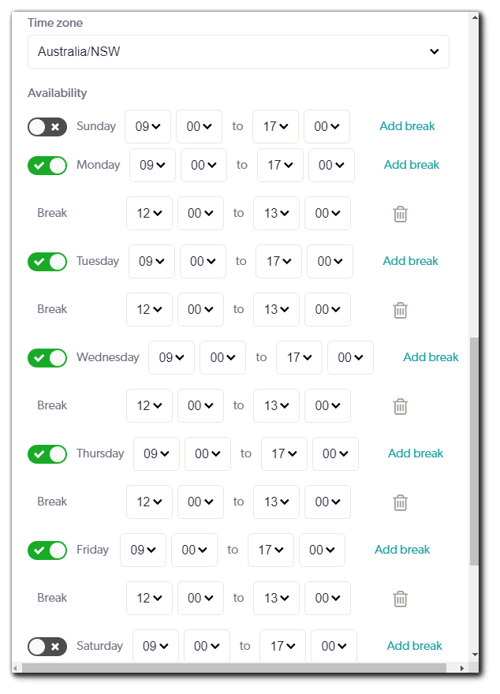 Finally, you will need to select from the Services provided section to indicate which of the appointment types that you defined earlier this practitioner is offering.
You can select all or some of the appointment types. Use Command + mouse click on a Mac or Ctrl + left mouse click on a PC to select multiple options. Then, click Save.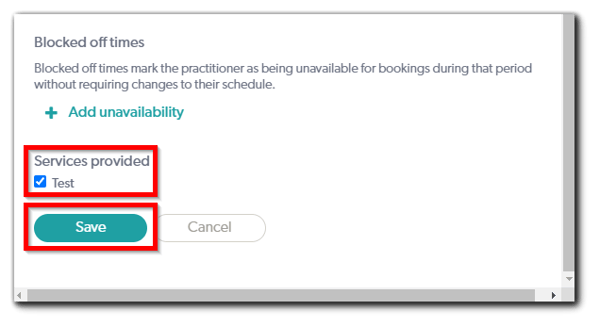 Repeat the above steps to add more practitioners.
Well done! You have now set up the types of service you want to provide, the duration, the cost and the practitioner providing the service.
Now, let's set up the details that a client has to provide when making a booking. This is the patient intake form.
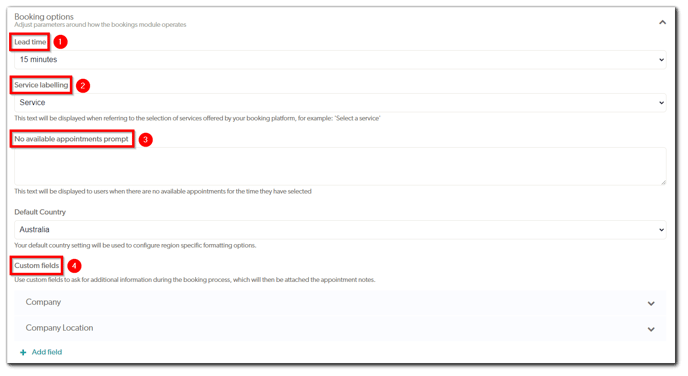
Step 4: Booking options
First, there are a couple of setup steps:
- The lead time says how much notification time a practitioner gets for a booking (i.e. 15 minutes lead time means that a client can't book a consultation 15 minutes before the consultation starts).
- The service labelling gives you a chance to give the appointment type a different name (e.g. it could be a 'Service', 'Consultation' or 'Treatment').
- Then, you can set up a notice for when there are no available appointments prompt for a day or time that a patient may select. For example, you can provide a phone number they can call.
- Finally, you can add or remove custom fields for the patient intake form that you want them to provide (e.g. what company they work for, where that company is located, etc.)
 The patient intake form might end up looking something like this:
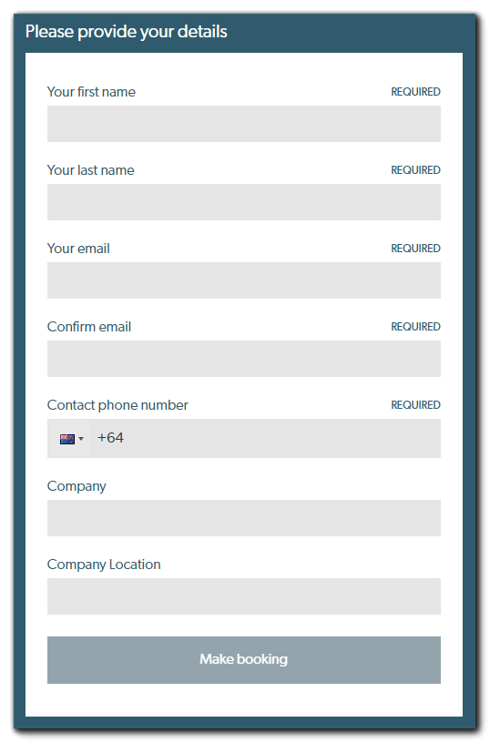
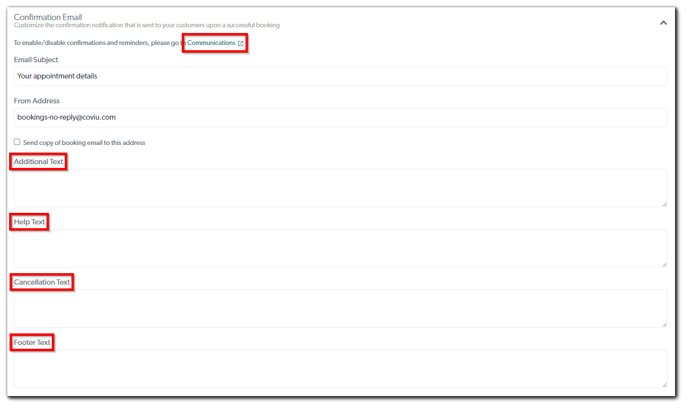
Step 5: Confirmation Email
In this section, you can customise the email confirmation received by your clients or patients after they book the service or provider. You can customise the text of the email here. You can manage the recipient of email confirmations, set up SMS confirmations, and set up email and/or SMS reminders by clicking Communications to configure your communications. Click here to learn more.
Note: SMS charges will apply if you enable SMS confirmations and/or reminders; click here to learn more.
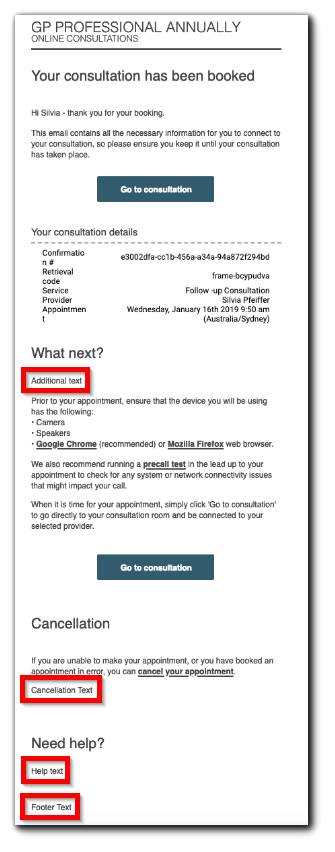
 Here's an example (draft) email that you can use as a guide in filling the text fields in the above form (note where the different additional text pieces can be added):
Step 6: Sharing
You have finished all the setup! Congratulations!
Now, all you need to do is put a booking button on your website. It might be worth engaging your Web Designer to create a Telehealth page advising your clients of your new telehealth offering, what they can expect from this, how it will differ from an in-person consult, where to go for support, etc. The button can be added there as well as on your homepage.
You can do this either through the Sharing option here or through Customer Connect. Customer Connect includes the link to online bookings.
This is where you format the booking button for your website. You can edit the text on the button, button colour and text colour.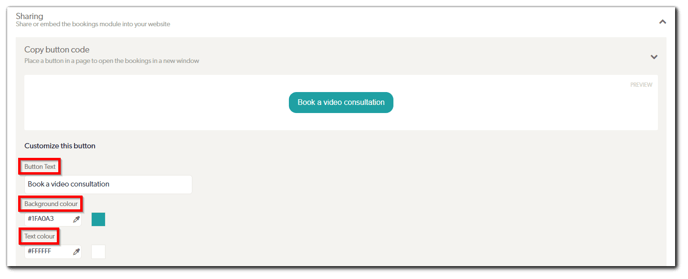 Then, to embed the button on your website, simply copy and paste the code from the How to use the button section. Again, this might be a task you give to your Web Designer.
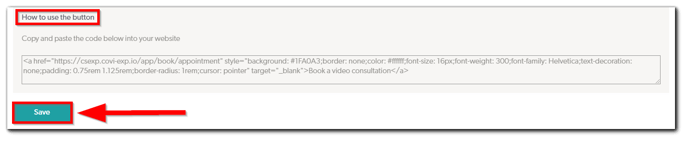 Do not forget to press Save!
Tip: you can test the booking functionality at: https://[your_account_subdomain].coviu.com/app/book/appointment.
More support options
You have completed another Coviu help article. You now know how to set up and use the Appointment Bookings App.
If this is not what you were looking for, explore our knowledge base and search for another article from here.
If you still require any assistance, please do not hesitate to get in touch with our friendly Customer Success team using any of the contact methods available here.