Last Updated: June 2022
Note: you will need to have Coviu Administrator privileges to undertake these activities.
On this page:
- What is the Waiting Area workflow?
- How do I access the Waiting Area configuration menu?
- What are the configuration options?
- More support options
What is the Waiting Area workflow?
The Waiting Area is one of several workflows built into the Coviu platform. To learn if this workflow is suitable for you, click here.
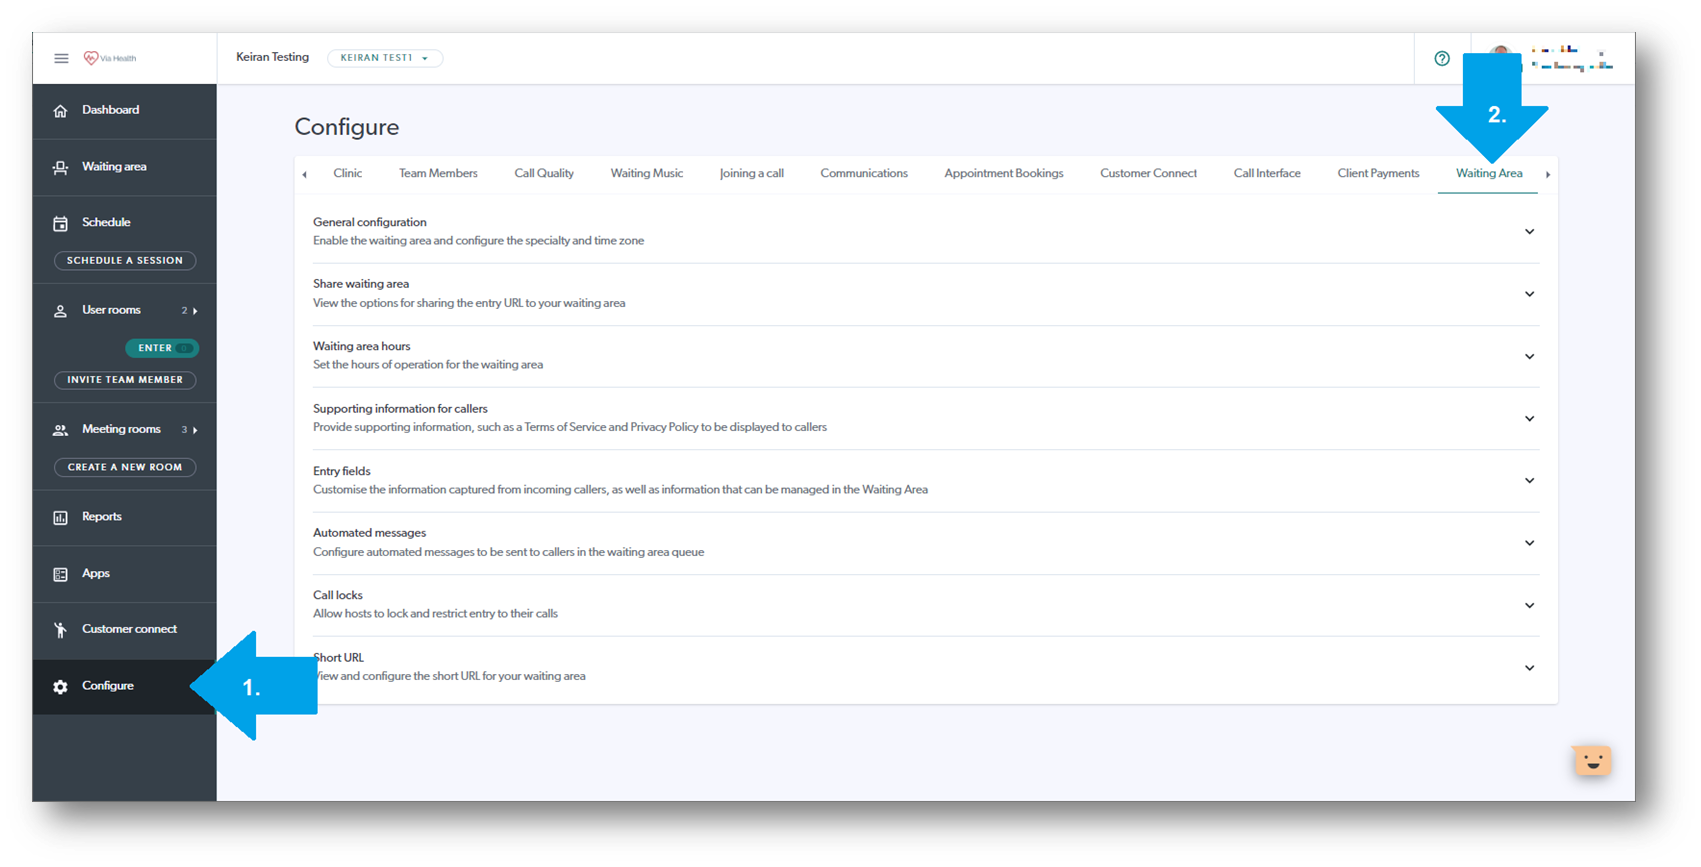
How do I access the Waiting Area configuration menu?
- Sign into Coviu as you normally would.
- Select the clinic you want to configure.
- Click the Configure menu on the left-hand side of the screen (if you cannot see the Configure menu, then you are not the Administrator for your clinic).
- Click the Waiting Area tab.
- A list of all your configuration options will be shown.
- Your Waiting Area is automatically activated when the clinic is created, however, you can disable it by deselecting the Enable Waiting Area toggle. We generally don't recommend disabling your Waiting Area unless that particular workflow isn't going to be used.
What are the configuration options?
Note: As you go through making changes, click the green Save button to save any changes you have made.

- General configuration
- Enable/Disable Waiting Area
- This feature allows you to 'close' your Waiting Area to your patients or clients. This option can be used in an event whereby your building/environment has to be evacuated and clinicians are unable to attend to telehealth calls.
- Set a disabled message (see instructions further below), to advise your clients/patients of the situation (e.g. "Due to unforeseen circumstances, we are unable to attend telehealth calls at present. If you are due to have a telehealth appointment now, please call xxxx xxxx xxxx to make alternative arrangements.")
- Optional - set a Waiting Area Consultation Name.
- Optional - add the specialty of the clinic.
- Optional but recommended - Enable Confirm Call Entry - turn this option on to display a message prior to entering a call which shows current call participants. This adds an additional layer of security to ensure a clinician is entering their call.
- Optional - Enable Display Current Queue Position - turn this option on to show callers in your Waiting Area queue what their current position is. We recommend trialling this feature as part of your workflow testing to ensure it meets your needs.
- Optional - Enable Guest Notification Messages - by default, your staff have the ability to send messages to waiting patients or clients. Enabling the Guest Notification Messages feature allows your patient or client to respond back. If you do not have the staffing resources to continually monitor for incoming messages, we do not recommend enabling this feature.
- Enable/Disable Waiting Area
-
- Mandatory - Set your time zone, click here to learn more.
- Optional - Set a Waiting Area Disabled Message - see section 1 above for details on enabling/disabling.
- Optional - Set a Waiting Area Out of Hours Message - in the unlikley event that a patient or client might click your Waiting Area link outside of your office hours, you can add a message with this feature which will be displayed to the client. Your message could be to advise of office hours or provide out-of-hours contact options.
- Don't forget to click Save.
-
- Share waiting area - Share your waiting area link with patients, so they can join a call and arrive at your clinic. You can:
- Share the link by copying it and sending it to your patients.
- Launch using a button. This means patients simply click a button on your webpage and a new page starting a video call automatically opens up in a new window. They will wait there until a practitioner or admin staff member enters the room.
- Embed into a web page. This will directly open the video consultation without leaving your web page.
- Don't forget to click Save.
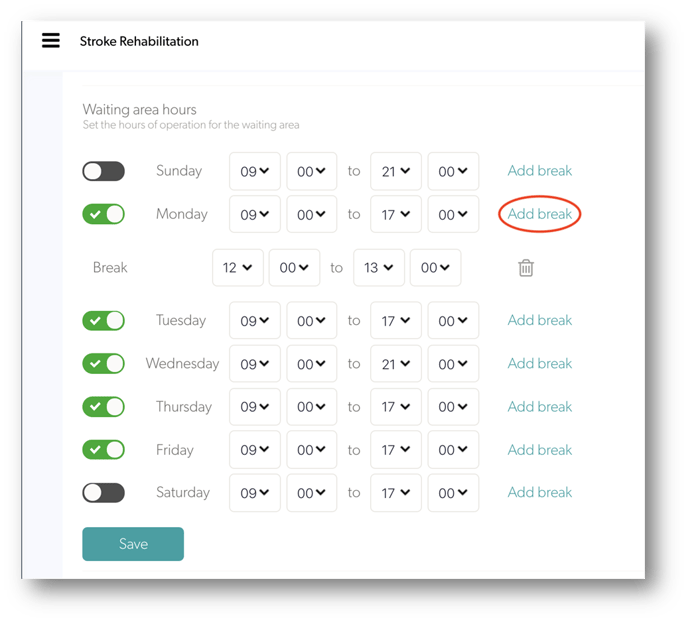
- Waiting area hours - Configure the Hours for each day's availability, including breaks. More in-depth instructions can be found here.
- Supporting information for callers - Create and edit a message for patients, that is shown whilst they are waiting to be seen. This message should tell patients how to contact your support team. You can also add clinic-specific links to your Privacy Policy, Terms of Service and a Help link.
- Entry fields - for a more in-depth information on the Entry Field options and instructions click here. Otherwise read on for a precis of the options.
Add or edit the type of information you want your client or patient to provide prior to being seen, for example, phone number, post code or ZIP code or a Medicare number. You can make these entry fields 'required' if the information is needed before continuing with the call. Coviu does not store this information, it is only presented in the Waiting Area for the duration of the consultation.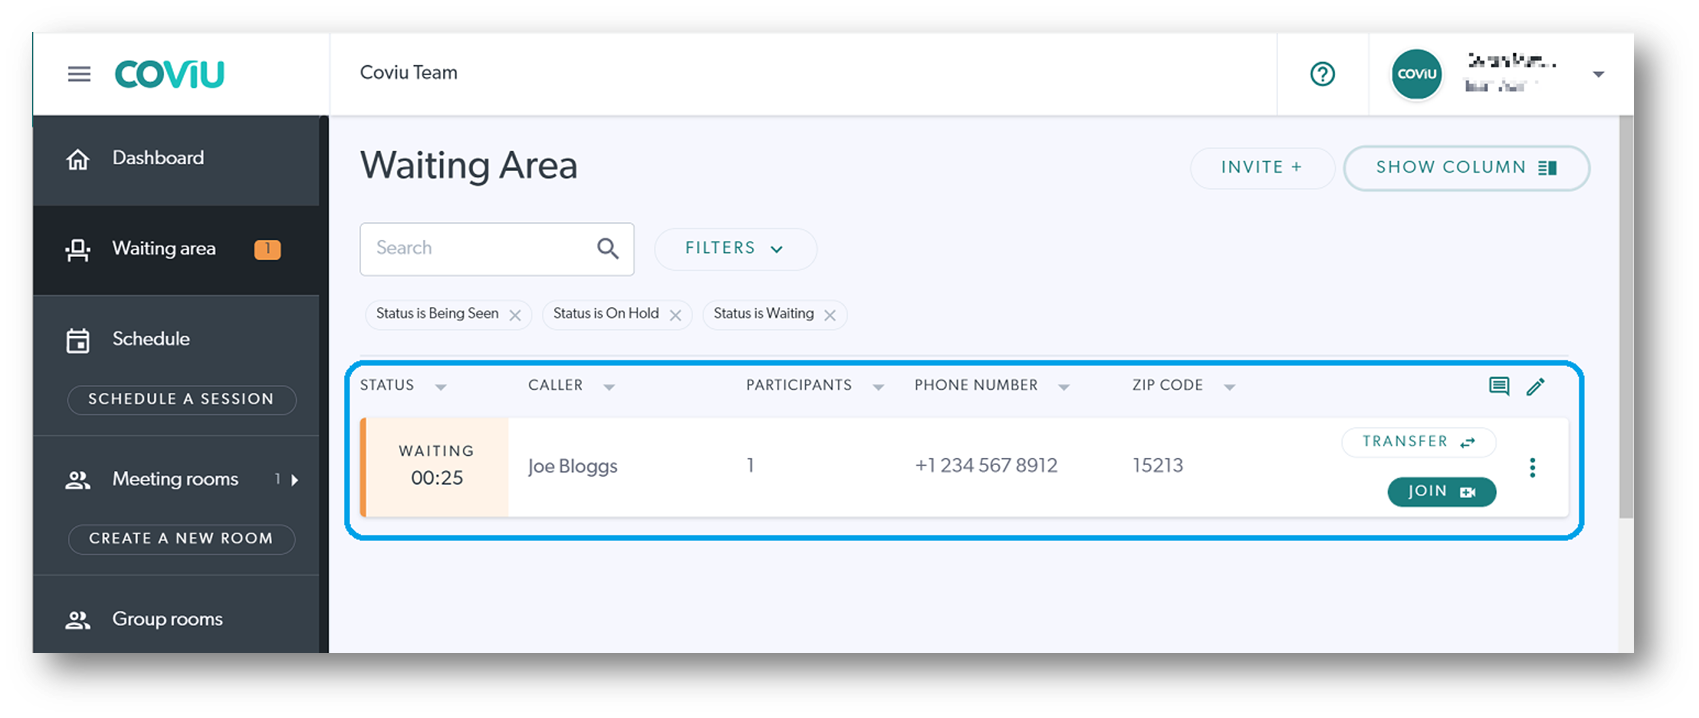
- Automated Messages - Create and edit automated text messages that are sent to patients in the waiting area, such as updates on waiting times or clinic announcements. For example "Call 911 if you have a medical emergency". You can also choose the timing at which these are sent.
- Call Locks - Add an additional layer of security for calls being held in your Waiting Area. This locking option does not apply to calls held via Scheduled Sessions or User Rooms. Click here to learn more.
- Short URL - Create a short URL to make your waiting room easier to share.
More support options
You have completed another Coviu help article. You now know about the various configuration options for your Waiting Area.
If this is not what you were looking for, explore our knowledge base and search for another article from here.
If you still require any assistance, please do not hesitate to get in touch with our friendly Customer Success team using any of the contact methods available here.