Last Updated: August 2023
Note:
- The feature is available to customers who are on these plans only:
- Standard (also the Trial plan)
- Premium
- Enterprise
- Not sure what plan you are on? Click here to find out.
- If you are on a custom Enterprise plan, you can click here to find out how to get this feature set up.
- To configure the call interface, you must be the account Owner or Administrator.
FAQ:
-
Can I add a logo to my Coviu clinic?
-
Yes! Click here to learn more.
-
-
Can I add a logo to the Waiting Room? (The Waiting Room is the step before you accept your client or patient into a call with you.)
-
No.
-
-
Can I include a logo in my invitation emails?
-
No.
-
On this page:
- How can I customise the call interface?
- What are the items that I can customise?
- More support options
How can I customise the call interface?
- Log into your Coviu account as you normally would.
- Scroll down on the left side menu of the Dashboard and click Configure (if you can't see the Configure button, then you are not the account Administrator).
- Find the Call Interface tab and click it.
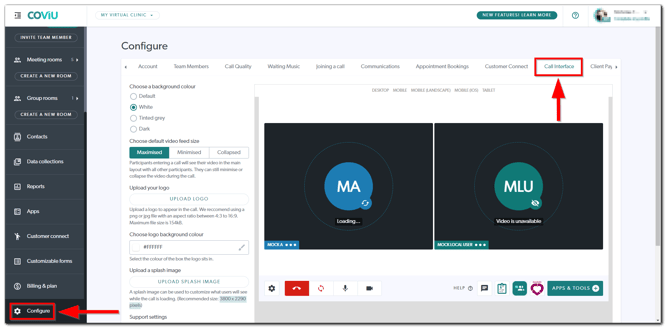
- Customise your call interface as you wish.
- Scroll down and click Save to save your changes.
What are the items that I can customise?
- The call interface background colour.
- You can pick between four colour choices for the call interface background as per accessibility standards.
- The default video feed size.
- You can choose your video feed to be the following when you enter your video consultations:
- Maximised: Participants entering a call will see their video in the main layout with all other participants. They can still minimise or collapse the video during the call.
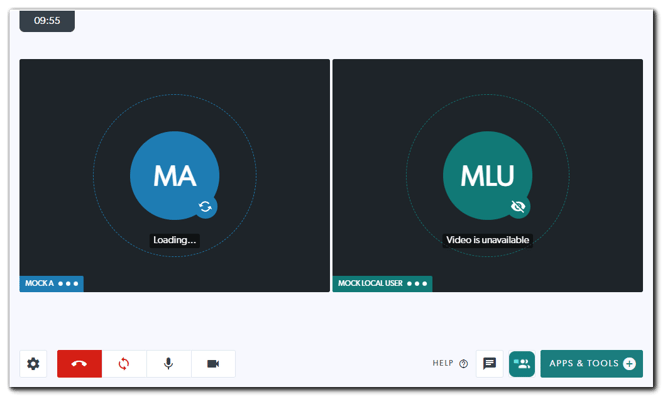
- Minimised: Participants entering a call will see their video minimised at the bottom left of the screen. They can still maximise or collapse their video during the call.

- Collapsed: Participants entering a call will not see their video, but will see their camera and microphone status at the bottom left of the screen. They can still maximise or expand their video during the call.

- Maximised: Participants entering a call will see their video in the main layout with all other participants. They can still minimise or collapse the video during the call.
- Please note that your selection will be applied to all call participants (i.e. hosts and guests) and to all types of calls (i.e. User Rooms, Meeting Rooms, Group Rooms, Scheduled Sessions and the Waiting Area).
- You can choose your video feed to be the following when you enter your video consultations:
- Upload your logo.
- This will be displayed at the top left corner of the call interface.
- We recommend using a PNG or JPG file with an aspect ratio between 4:3 to 16:9 with a maximum file size of 154 kB.
- Choose the background colour of your logo.
- You can either insert the specific hex code for the desired colour or use the colour picker by clicking the brush icon.
- Upload a splash image.
- The splash image will be shown briefly to the client or patient, and the healthcare provider when entering a video consultation and it is loading.
- We recommended an image size of 3800 x 2290 pixels.
- Support settings.
- We recommend that you leave this enabled so that all call participants can access our support services during a video consultation.
- Call duration timer.
- Enabling this will display a timer at the top left corner of the call interface.
- This timer will start counting up when there are at least two call participants.
Note: It is not possible to change the primary and secondary button colours at this stage.
More support options
You have completed another Coviu help article. You now know how to customise your Coviu call interface.
If this is not what you were looking for, explore our knowledge base and search for another article from here.
If you still require any assistance, please do not hesitate to get in touch with our friendly Customer Success team using any of the contact methods available here.